Table of Content
- What Is an Automatic Poultry Waterer?
- Types of Automatic Chicken Waterers
- How to Train Poultry to Use Automatic Waterers
- Practical Considerations for Choosing an Automatic Waterer
- Maintaining Your Automatic Poultry Waterer
- Why Switch to an Automatic Chicken Waterer?
- About the Author
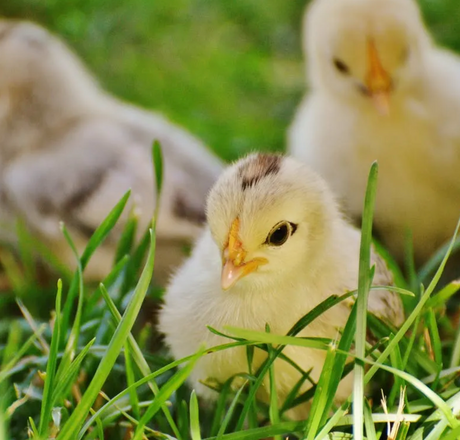
Keeping your chickens, quail, or other poultry properly hydrated is one of the most important responsibilities in poultry care. Traditional waterers require frequent refills, cleaning, and carry a risk of contamination from droppings, algae, and debris. That’s where the automatic poultry waterer steps in—offering a more efficient, cleaner, and hands-off solution for both backyard hobbyists and commercial poultry keepers.
In this guide, we’ll explore the types of automatic poultry waterers, how to train birds to use them, practical considerations, and long-term maintenance tips, all based on best practices and proven insights from industry-leading designs.

What Is an Automatic Poultry Waterer?
An automatic poultry waterer is a watering system that delivers fresh water to your flock with minimal manual effort. It’s typically connected to a water reservoir, garden hose, or gravity-fed tank and automatically dispenses water through nipples, cups, or troughs as needed.
- Provide clean, fresh water on demand
- Reduce labor and time spent refilling containers
- Help minimize water contamination
- Scalable for small backyard flocks or large coops
Whether you're using a basic poultry nipple setup or a more complex bell drinker or float-valve system, the goal is the same: consistent hydration and cleaner water delivery.
Types of Automatic Chicken Waterers
1. Nipple-Based Chicken Waterers

Chicken water nipples are small, spring-loaded valves that release water when pecked. They’re a popular choice due to their minimal water waste and sanitary design.
Advantages:
- Great for chickens, quail, and gamebirds
- Prevents splashing and debris buildup
- Can be connected to PVC pipes or water buckets
- Ideal for layer/breeder cages and grow-out pens
Best Practice:
Install one nipple per 4–5 birds. Ensure water pressure is regulated (max ~3 PSI).
2. Chicken Waterer Cups
Chicken waterer cups are small bowls that refill automatically when water is consumed. They’re easy to install and ideal for small flocks or DIY setups.
Pros:
- Birds can see the water, aiding training
- More intuitive than nipples for beginners
- Compatible with most buckets or containers
Cons:
- Can collect dirt and need more cleaning
- Not suitable for freezing climates without heat
Installation Tip:
Place cups at neck height and ensure they’re level to prevent leaks or overflow.
3. Bell Drinkers
Popular in commercial settings, automatic bell drinkers are gravity or low-pressure fed and provide constant access to water in a bell-shaped basin.
Features:
- Suitable for chickens, ducks, and gamebirds
- Includes float mechanisms and height adjusters
- Easy to clean and manage for larger coops
4. Float-Valve and Trough Systems
These use an internal float to maintain water levels in a larger container or trough. They work well with garden hoses and are ideal for larger operations.
Notable Examples:
- No-Mess Drinker prevents birds from fouling water
- DIY float-valve systems using livestock troughs
5. Self-Cleaning Hose-Fed Waterers
These systems use a pressure blast to self-clean the container as it refills. They reduce algae buildup, stagnant water, and mosquito larvae.
Pro Tip:
Install a timer or valve to control fill cycles if no shut-off is included.

How to Train Poultry to Use Automatic Waterers
Training your flock to use chicken nipples or water cups is simple, but it requires consistency and timing:
- Start chicks on traditional dishes for 1–2 weeks
- Gradually introduce automatic chicken waterers
- Tap the nipple or cup to release water; show birds with your finger
- Once one learns, others follow
Training Timeline:
- Brooders: Use standard dishes or cups for 1–2 weeks
- Grow-out cages: Switch to water cups
- Layer/breeder cages: Upgrade to nipples or auto-cups
Tip: Begin transition during mild weather. Avoid switching during heat or cold.

Practical Considerations for Choosing an Automatic Waterer
Before choosing a setup, consider the following:
- Species: Chickens and quail adapt well to nipples/cups. Ducks need shallow dishes for cleaning nares.
- Climate: Use heated bases or recirculating systems in freezing weather
- Water Source: Gravity systems for off-grid, hose systems for consistent pressure
- Number of birds: Over 20? Use silo drinkers or multi-nipple setups

Maintaining Your Automatic Poultry Waterer
Even automatic systems need regular checks. Here's how to keep things running:
- Inspect nipples and cups daily for blockages or leaks
- Clean cups with a turkey baster
- Tighten leaky parts
- Check reservoirs regularly
- Watch for stuck float valves or drain issues
- Keep bedding away from waterers
Important: Never switch systems during a heat wave without backups. Dehydration causes stress and illness.
Why Switch to an Automatic Chicken Waterer?
Here’s what makes these systems a favorite among poultry keepers:
- ✅ Reduces manual labor and daily refills
- ✅ Keeps water clean and algae-free
- ✅ Scales with flock size
- ✅ Encourages consistent hydration
- ✅ Reduces spillage and wet bedding
- ✅ Works with brooder, grow-out, and breeder cage setups
Visit our poultry blog to learn more about similar articles.
About the Author
Written by: