
Table of Contents
- Step 1: Choose and prepare the brooder
- Step 2: Prepare safe flooring or bedding
- Step 3: Set up and test the heat source
- Step 4: Add chick feed and clean water
- Step 5: Choose the right location
- Step 6: Plan for cleaning and enrichment
- Step 7: Set up a simple biosecurity routine
- Step 8: Avoid common brooder setup mistakes
- Chick brooder setup FAQs
- Final check before your chicks arrive
You do not want to discover a cold corner, leaking waterer, or slippery floor after a box of day-old chicks is already sitting in front of you.
A chick brooder works better when it is completely set up before the birds arrive. That gives you time to test the heat, check the temperature at chick level, make sure the waterer stays upright, and notice problems while they are still easy to fix.
Penn State recommends preparing the brooding area about 48 hours before chicks arrive, while UNH advises setting up and testing the brooder at least one day ahead. (1) (2)
Quick answer: How do you set up a brooder for baby chicks?
Before your chicks arrive, prepare a secure brooder with enough floor space, dry non-slip flooring, a properly installed heat source, a warm zone around 92 to 95°F at chick level for the first week, a cooler area the chicks can move into, chick starter feed, clean water, ventilation without direct drafts, and a location protected from pets and predators. Set everything up at least 24 hours in advance so you can test the temperature and equipment before the chicks go in. (1) (2)
If you are still deciding what type of brooder you need, our chicken brooder guide explains brooder types, heat, flooring, space, and cleaning. Once your chicks arrive, use our chick brooding guide for the week-by-week care that follows.

Step 1: Choose and Prepare the Brooder
A brooder is the controlled space where young chicks spend their first weeks while they still depend on supplemental warmth and closer environmental management.
You can brood a small group in a simple enclosure or use a purpose-built system. Either way, the enclosure needs to be stable, easy to clean, protected from predators and pets, large enough for the chicks to move between warm and cooler areas, and designed so the birds cannot escape as they become more active.
What Can You Use as a Chick Brooder?
- Plastic storage totes: Useful for small groups if they provide enough ventilation and usable floor space.
- Stock tanks: Sturdy and useful for larger floor-brooded groups.
- Kiddie pools: Provide open floor space but need a secure chick guard or cover as the birds become more mobile.
- Cardboard boxes: Best treated as a temporary option because moisture, cleaning, and heat-source safety can become difficult to manage.
- Purpose-built brooders: Combine the enclosure with features such as feeding, watering, waste management, and heat in a more controlled setup.
If you prefer a purpose-built setup, Hatching Time's chick brooders are available in different configurations for smaller and larger poultry.
How Much Space Do Chicks Need in a Brooder?
The original version of this guide listed "6 inches per chick" for the first four weeks, but brooder capacity should be measured as usable floor area, not a single length measurement.
Penn State gives the following minimum floor-space guidance for chickens as they grow: (1)
| Age | Minimum floor space per chick | What this means for setup |
|---|---|---|
| First week | 1/4 sq. ft. | Enough room to reach heat, feed, and water without crowding. |
| 2-3 weeks | 1/2 sq. ft. | Increase usable space as chicks become more active. |
| 3-5 weeks | 3/4 sq. ft. | Watch feeder and water access as the flock grows. |
| 5-8 weeks | 1 sq. ft. | Birds need considerably more room before the adult housing stage. |
These figures are planning minimums, not a target for how many chicks you should squeeze into a brooder. Larger breeds, equipment placement, feeder access, and the shape of the enclosure all affect how much usable space remains.
Do not start day-old chicks in an enormous uncontrolled area just because you have the space. Penn State recommends using a chick guard or smaller controlled area for very young chicks when the larger enclosure makes it difficult for them to stay near heat, feed, and water. (1)
Step 2: Prepare Safe Flooring or Bedding
The floor needs to do two jobs immediately: give chicks enough traction to stand and walk normally, and help keep the brooder dry.
For floor brooders, Penn State recommends starting with about 2 to 3 inches of clean, dry litter. During the earliest days, paper towels or another suitable textured covering can be placed over the litter so chicks have good traction and can distinguish feed from bedding. (1)
Avoid leaving young chicks directly on slick newspaper, smooth plastic, or bare wood. Poor traction can contribute to leg problems. Fine litter that chicks can easily consume is also a poor choice during the first weeks. (1)
Purpose-built brooders may use a washable mat or mesh-style floor with a waste tray below instead of loose bedding. In that case, follow the manufacturer's setup instructions and make sure the floor openings are appropriate for the size of the birds.

Step 3: Set Up and Test the Heat Source
Do this before the chicks arrive, not while they are waiting in a shipping box.
Penn State recommends warming the brooding area in advance so the floor, bedding, and equipment are already at a suitable temperature when chicks are placed. For the first week, the warm zone should be about 92 to 95°F at chick level. UNH gives a similar first-week range of 90 to 95°F. (1) (2)
The important phrase is at chick level. A thermometer hanging well above the birds may tell you very little about what they are actually experiencing.
| Age | Approximate warm-zone temperature |
|---|---|
| Week 1 | About 92-95°F |
| Week 2 | About 85-90°F |
| Week 3 | About 80-85°F |
| Week 4 | About 75-80°F |
| Week 5 and beyond | Continue reducing heat as feathering, room temperature, and chick behavior allow. |
This is a setup guide, so we are keeping the temperature schedule brief. Our complete brooding guide covers temperature changes, chick behavior, and heat reduction in more detail.
Which Heat Source Should You Use?
Different heat systems can work when they are installed and managed correctly. Penn State lists several artificial heat sources and emphasizes secure installation, correct chick-level temperature, and enough space for chicks to move away from the heat when they are comfortable. (1)
- Heat lamps: Secure the fixture independently so it cannot fall, keep it away from flammable materials, and protect the hot bulb from splashing water. Do not hang a heat lamp by its electrical cord. (1) (2)
- Radiant heat plates: Follow the manufacturer's height and capacity instructions and adjust the plate as the chicks grow.
- Integrated brooder heaters: Follow the operating instructions for the specific brooder and confirm comfort by watching the chicks rather than relying only on the equipment setting.
You can also compare chick heating plates if you are using a brooder that does not have an integrated heating system.
How Can You Tell If the Chicks Are Comfortable?
- Too cold: Chicks crowd tightly near the heat and may call loudly.
- Too warm: Chicks consistently move as far from the heat source as they can.
- Draft present: Chicks may crowd away from the direction of the airflow.
- Comfortable: Chicks are distributed naturally through the brooder and move between feeding, drinking, resting, and warmer areas. (1)
Step 4: Add Chick Feed and Clean Water
Have feed and water in place before the chicks enter the brooder so they can find both quickly after arrival.
What Should You Feed Day-Old Chicks?
Use a complete chick starter formulated for young birds rather than layer feed. Penn State recommends an 18 to 20% protein chick starter for young chickens. University of Maine gives 18 to 20% starter for pullets and higher starter protein for meat-type birds. (1) (3)
Do not substitute adult layer feed. Layer rations are formulated with much higher calcium levels for laying hens and are not appropriate for growing chicks. (1)
Medicated versus non-medicated starter depends on your coccidiosis-management plan and vaccination status. University of Maine notes that chicks vaccinated with a coccidiosis vaccine should receive non-medicated feed rather than a starter containing a coccidiostat. Check the information from your hatchery, vaccine provider, or feed label before choosing. (3)
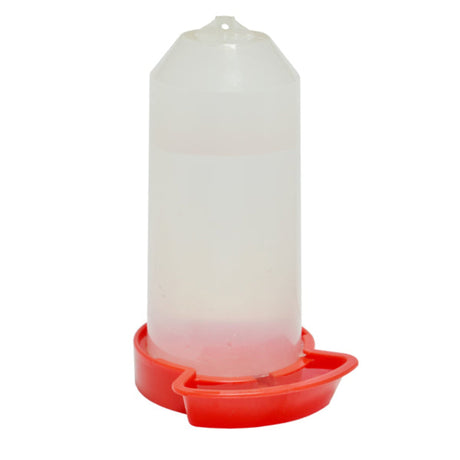
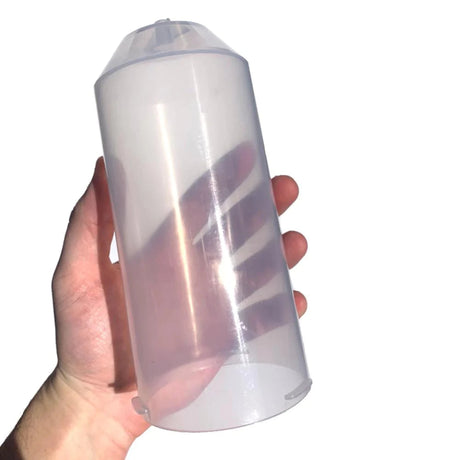
What Kind of Waterer Do Chicks Need?
Fresh, clean water should be available at all times. University of Maine recommends cleaning chick waterers daily. (3)
- Use a chick-appropriate waterer that birds can reach without climbing into it.
- Place it where it is unlikely to become filled with litter or feed.
- Check for leaks before the chicks arrive.
- As the birds grow, raise or replace equipment so it remains easy to reach without encouraging contamination. (1)
Plain, fresh water is the baseline. If you choose to use an electrolyte or other supplement during a specific situation, follow the product label and any guidance from your hatchery or veterinarian rather than treating supplements as a required part of every brooder setup.
Step 5: Choose the Right Location
The best brooder location is protected, easy to check several times a day, and stable enough that the heat system is not constantly fighting drafts or large temperature changes.
A garage, barn area, utility space, enclosed outbuilding, or another protected location can work depending on the climate and the equipment you are using.
Before settling on a location, check:
- Drafts: Avoid direct airflow across the chicks while still allowing fresh air and ventilation.
- Temperature swings: Think about the coldest part of the night, not only the daytime temperature.
- Pets and predators: Dogs, cats, rodents, and wildlife should not be able to reach the chicks.
- Water and electricity: Make sure cords, plugs, hoses, and water cannot create a hazard around the heat source.
- Access: Put the brooder somewhere you can realistically check food, water, temperature, and chick behavior throughout the day.
Penn State specifically recommends a draft-free brooding area and warns against large temperature swings during the first six weeks. (1)
Step 6: Plan for Cleaning and Enrichment
The easiest brooder to keep clean is the one you planned to clean before it was full of chicks.
Daily Brooder Checks
- Check waterers and remove contamination.
- Remove wet or heavily soiled litter or clean the waste tray.
- Make sure feeders remain accessible and dry.
- Look for chicks that are unusually quiet, isolated, weak, or unable to reach food or water.
- Check the temperature and then compare it with the chicks' behavior.
Water and damp litter deserve particular attention. Moist conditions and contaminated equipment increase the amount of cleaning you will need later and can contribute to disease pressure. University of Maine recommends regular cleaning and disinfection of feeding and watering equipment as part of coccidiosis control. (3)
Do Baby Chicks Need Enrichment?
You do not need to turn the brooder into a playground. Chicks already spend much of their time eating, drinking, resting, scratching, and exploring their surroundings.
Once they are steady on their feet and the setup remains safe, simple additions such as a low, stable perch or additional room to explore can give them more behavioral choice without cluttering the brooder.
Outdoor excursions belong later in the process and depend on feathering and weather. When you reach that stage, use our guide to moving chicks from the brooder to the coop rather than using outdoor time as an arrival-day setup step.
Step 7: Set Up a Simple Biosecurity Routine
Biosecurity sounds more complicated than it needs to be. Most of it comes down to controlling what enters the brooder area and keeping equipment clean.
USDA APHIS recommends washing hands before and after contact with poultry, using clean or dedicated clothing and footwear around birds, limiting unnecessary visitors, and cleaning and disinfecting equipment and enclosures regularly. (4) (5)
- Wash your hands before and after handling chicks or their equipment.
- Do not move dirty boots, tools, feeders, or other equipment directly from another flock into the brooder area.
- Use dedicated or freshly cleaned footwear and clothing if you also care for other poultry.
- Keep wild birds and other animals away from chick feed, water, and the brooder.
- Clean reusable equipment before a new group of chicks arrives.
Clean first, disinfect second. USDA APHIS notes that disinfectants do not work properly through manure, feathers, dirt, and other organic material. Remove debris, wash the surface, apply an appropriate disinfectant according to its label, and allow equipment to dry before reuse. (4)
Step 8: Avoid Common Brooder Setup Mistakes
Waiting Until the Chicks Arrive to Turn on the Heat
The air may warm quickly while the floor, litter, feeder, and surrounding surfaces remain cold. Set the brooder up in advance and give the entire environment time to stabilize. (1)
Measuring Temperature Above the Chicks
Measure temperature where the birds actually live. A thermometer several inches or feet above chick level can hide a cold floor or overheated warm zone.
Heating the Entire Brooder to One Temperature
Chicks need enough room to move toward warmth when they are cold and away from it when they are comfortable. Do not create an enclosure with no cooler area. (1)
Using a Slippery Floor
Smooth newspaper, wood, or plastic without suitable traction can contribute to leg problems. Prepare the floor before the chicks arrive. (1)
Using Layer Feed for Baby Chicks
Young chicks need starter feed formulated for growth. Layer feed contains too much calcium for young birds. (1)
Assuming Every Chick Needs Non-Medicated Starter
The decision depends on vaccination status and your coccidiosis-management plan. Check the hatchery and feed information rather than choosing automatically. (3)
Underestimating How Quickly Chicks Grow
The brooder that feels spacious during Week 1 may become crowded surprisingly fast. Plan for increasing floor, feeder, and water space before the birds need it.
Chick Brooder Setup FAQs
How Early Should I Set Up a Brooder Before Chicks Arrive?
Set up and test the brooder at least 24 hours before arrival. Penn State recommends completing the setup about 48 hours in advance so the floor, litter, and equipment have time to warm and you can correct temperature or equipment problems before the chicks arrive. (1) (2)
What Temperature Should the Brooder Be When Day-Old Chicks Arrive?
Aim for a warm zone around 92 to 95°F at chick level during the first week. The rest of the brooder should allow chicks to move away from the heat when they are comfortable. Watch chick behavior as well as the thermometer. (1) (2)
What Should Be Inside a Chick Brooder?
A basic brooder needs a secure enclosure, safe non-slip flooring, a reliable heat source, a warm and cooler zone, chick starter feed, clean water, enough usable space, and ventilation without a direct draft.
Can I Use a Cardboard Box as a Chick Brooder?
A sturdy cardboard box can work as a temporary setup for a small number of chicks if it provides enough room, ventilation, traction, and safe separation from the heat source. Cardboard becomes harder to clean and manage once it gets damp, so it is usually better as a short-term solution than a long-term brooder.
Do I Need Medicated Chick Starter?
Not every flock needs the same feed plan. Medicated starter may be used as part of coccidiosis prevention, but chicks vaccinated against coccidiosis may need non-medicated feed instead. Check your hatchery's vaccination information and the feed label before choosing. (3)
How Long Will Chicks Need the Brooder?
Many chicks remain in a brooding environment for roughly the first five to six weeks, but age alone does not decide when they can move. Feathering, heat dependence, overnight temperatures, health, and the conditions in the next enclosure all matter. For the full readiness checklist, see our guide on when chicks can move from the brooder to the coop.
Final Check Before Your Chicks Arrive
Turn the brooder on and look at it as if the chicks were already there.
Is the warm zone at the right temperature at chick level? Is there somewhere cooler to move? Is the floor dry and easy to grip? Can a chick reach the feeder and waterer without climbing into them? Is anything leaking? Can a pet reach through the enclosure? Could the heat source fall or come into contact with something flammable?
Fixing those problems now is easier than fixing them while twenty curious chicks are trying to investigate your hands.
If your chicks are coming from eggs you are hatching yourself, our guide to properly incubating poultry eggs covers the stage before brooding. Once the chicks are in the brooder, continue with the complete chick brooding guide.
References
- Penn State Extension. Brooding of Domestic Fowl.
https://extension.psu.edu/brooding-of-domestic-fowl - University of New Hampshire Cooperative Extension. Brooding and Caring for Chicks.
https://extension.unh.edu/resource/brooding-and-caring-chicks - University of Maine Cooperative Extension. Giving Chicks a Good Start.
https://extension.umaine.edu/publications/2219e/ - USDA APHIS. Build a Clean Routine.
https://www.aphis.usda.gov/livestock-poultry-disease/avian/defend-the-flock/biosecurity-basics/build-clean-routine - USDA APHIS. Control What Comes In.
https://www.aphis.usda.gov/livestock-poultry-disease/avian/defend-the-flock/biosecurity-basics/control-what-comes
Written by:

Elif Oztuna