
Chicken eggs usually hatch about 21 days after incubation begins, whether they are under a broody hen or in an incubator. But hatch day is a target, not an appointment. You might see the first signs of a chick breaking through its shell around day 20, while another egg from the same batch takes a little longer.
If you are wondering when to stop turning, when pipping should begin, or when newly hatched chicks can leave the incubator, here's the timeline and what to do at each stage.
How Long Do Chicken Eggs Take to Hatch Naturally?
Under a broody hen, fertile chicken eggs generally take about 21 days to hatch. The hen provides warmth, turns the eggs, and makes short trips away from the nest to eat and drink. She also settles and adjusts her position as the embryos develop.
That does not guarantee every egg will hatch. Fertility, shell condition, egg storage, the hen's ability to cover the clutch, and interruptions to incubation all affect the result. There isn't one reliable clutch size for every hen, either. A small bantam and a large hen cannot necessarily cover the same number of eggs.
Keep the nest secure, dry, and protected from disturbance, with food and water accessible to the hen. If you want to understand why a hen stays on the nest, see our guide to recognizing a broody hen.
How Long Do Chicken Eggs Take to Hatch in an Incubator?
In an artificial incubator, the usual timeline is also about 21 days. Start counting from when fertile eggs begin sustained incubation, not from when they were laid. Incubators and hatch records sometimes label the setting day as day 0 or day 1, so write down the actual setting date and expected hatch date instead of relying only on a day number.
Before setting eggs, run the machine long enough to confirm stable temperature, humidity, ventilation, and egg turning. Our first-time incubator checklist covers those preparation steps. If you are still choosing a machine, compare egg incubators by capacity, turning method, and whether the model handles both setting and hatching.
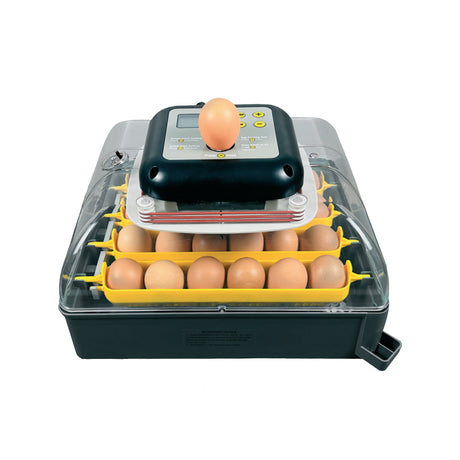
If you're hatching a smaller batch of chicken eggs, tabletop incubators are worth comparing. For a specific capacity option, consider the PRO24 automatic egg incubator, designed for batches of up to 24 chicken eggs.
Chicken Egg Hatching Timeline: Day 1 to Day 21
Use this as a planning guide for chicken eggs, rather than a promise that every chick will develop on exactly the same schedule.
| Stage | What Is Happening | What You Should Do |
|---|---|---|
| Days 1–7 | Early embryo and blood vessel development | Maintain the correct conditions, turn eggs, and candle around day 7 if planned. |
| Days 8–14 | The embryo grows; the egg becomes darker when candled. | Continue turning and compare embryo and air cell development. |
| Days 15–17 | The chick approaches the final stage of development. | Keep conditions stable and prepare the hatching area and brooder. |
| Day 18 | The chick begins positioning for hatch. | Stop turning and begin lockdown according to the incubator manual. |
| Days 19–21 | Internal pipping, external pipping, resting, zipping, and hatching | Avoid unnecessary opening, maintain ventilation, and monitor the hatch. |
| After hatch | Chicks rest, dry, and become more active. | Move dry, active chicks to a ready brooder with feed and water. |
Temperature and Humidity During the 21 Days
One detail matters before you choose a temperature: is your incubator fan-forced or still-air? They do not use the same thermometer reading. For most fan-forced incubators, approximately 99.5–100°F (37.5–37.8°C) is a common chicken egg setting. Still-air incubators commonly use about 102°F (38.9°C), measured at the top of the eggs, because the air inside forms warmer and cooler layers. Always follow the measuring position and operating instructions for your exact model.(1)(2)
A common humidity starting point is 50–55% during days 1–17 and approximately 65–70% during days 18–21. Those are working ranges, not a universal setting for every incubator, room, and batch. Different extension guides use somewhat different humidity targets; the developing air cells and your model's instructions provide important context. Keep the ventilation openings required by the manufacturer clear, especially during hatch.(1)(2)(3)
For lockdown, use the hatch-stage temperature specified for your incubator model. Some dedicated hatchers use a different temperature from the setter, while other machines maintain their programmed setting through hatch.
For thermometer placement, humidity adjustments, and the differences between fan-forced and still-air systems, read our chicken egg incubation temperature and humidity guide.
Turning and Candling
Chicken eggs need regular turning through the early and middle stages of incubation. When turning by hand, turn eggs at least three times daily, preferably an odd number of times such as three or five, so the same side does not remain uppermost every night. Automatic turners follow the machine's programmed schedule. Stop turning on day 18 to give chicks time to position themselves for hatch.(1)(3)
Many poultry keepers candle around days 7 and 14, with a final check around day 18 if needed. Visible blood vessels can indicate development, but a clear-looking egg does not always prove infertility. Shell color, timing, and early embryo loss can make the result harder to interpret. If you are unsure, compare observations rather than removing an intact egg after one unclear view. Our day-by-day egg candling guide explains what to look for.
For a closer look at egg orientation and turning routines, see properly incubating poultry eggs.
How Long Do Chicken Eggs Take to Hatch After Pipping?
You may hear quiet peeping before seeing a crack. That's because hatching begins inside the shell.
- Internal pip: The chick breaks into the air cell and begins breathing air.
- External pip: The chick makes the first visible break in the shell.
- Resting: The chick may pause while it prepares for the final effort.
- Zipping: The chick works around the shell until it can push free.
After external pipping, a chick may emerge within several hours or take longer, with rest periods between visible movements. Hatching time varies; a fixed number of hours should not be used by itself to decide whether the chick needs help.(4)
Resist the urge to crack the shell for a chick that appears to be taking a break. Premature assistance can injure a chick that has not finished absorbing blood vessels or yolk. If you suspect a genuine problem, seek experienced poultry or veterinary guidance rather than using a fixed number of hours as the only reason to intervene.
Post-Hatch Care: What Happens After They Hatch?
Newly hatched chicks are wet, tired, and often surprisingly quiet at first. Leave them in the incubator or hatcher until they are dry, fluffy, and able to move well. Then transfer them to a clean, preheated brooder. Chicks have yolk reserves, but keeping dry chicks in a warm hatcher for too long can cause dehydration. Mississippi State Extension describes roughly 1–24 hours as a normal removal window, depending on chick condition and how the hatch is progressing.(5)
A brooder using a conventional overhead heat source commonly starts around 90–95°F (32–35°C) at chick level during the first week, with room for chicks to move away from the warmest area. Heated-plate and enclosed brooder systems should be set up according to their own instructions instead of applying one room-temperature number everywhere. Watch the chicks: crowding tightly under the heat can indicate cold; spreading far away and panting may mean they are too hot.(6)
Provide clean drinking water and appropriate chick starter feed as soon as chicks move into the brooder. Use a shallow, chick-safe drinker, provide feed the chicks can reach, and choose a floor surface that gives their feet good traction.(6)
If you are preparing for your first hatch, our chick brooding guide covers heat, nutrition, and early care. You can also compare chick brooders and accessories if you still need a suitable setup.
Traditional Methods: Alternative Incubation Without Electricity
Electric incubators make it easier to measure and maintain temperature, humidity, turning, and ventilation. Before modern equipment, people also used broody hens and various locally developed heated incubation systems.
For a backyard keeper without electricity, a dependable broody hen is the most familiar alternative. Historical methods involving heated materials require careful environmental control, and hatch results vary with the technique, temperature consistency, and egg handling.
If electricity is unreliable and you are considering an artificial incubator, plan for backup power according to the equipment's requirements before setting eggs. Improvised heat alone does not replace controlled incubation.
How to Move Eggs to the Hatcher and Chicks to the Brooder: Step-by-Step Guide
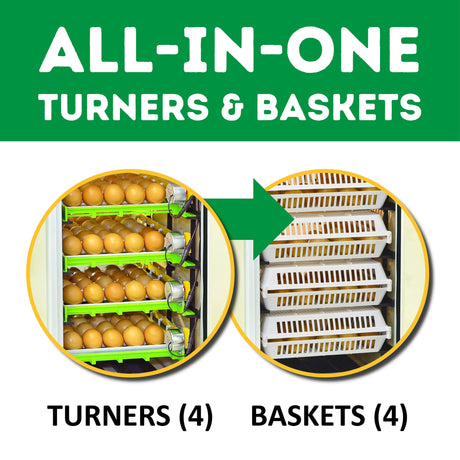
Lockdown starts around day 18 for chicken eggs. At that stage, the eggs stop turning and move into the position where chicks will hatch. Some incubators use the same chamber for the full 21 days; others transfer eggs from a setter to separate hatching baskets or a dedicated hatcher.
When to Move Eggs to the Hatcher
Around day 18, follow your machine's procedure for stopping the turner and transferring eggs to the hatching area. Have the hatcher stabilized at its model-specific settings before the transfer. This is also when you move from the incubation humidity program to the hatch-stage program.
Video: Hatching Time explains when eggs should move from the turning stage into a hatching basket or hatcher.
How to Move Eggs to the Hatcher
- Confirm that the receiving hatching area is ready and running at the settings specified for your model.
- Stop the turning system according to the manufacturer's instructions. Do not switch off the entire incubator simply to move the eggs unless the manual specifically requires it.
- With clean, dry hands, gently transfer eggs into the designated hatching baskets or trays. Keep them secure and follow the egg placement instructions for the model.
- Return baskets promptly, restore normal operation, and avoid repeated opening once chicks begin to pip.
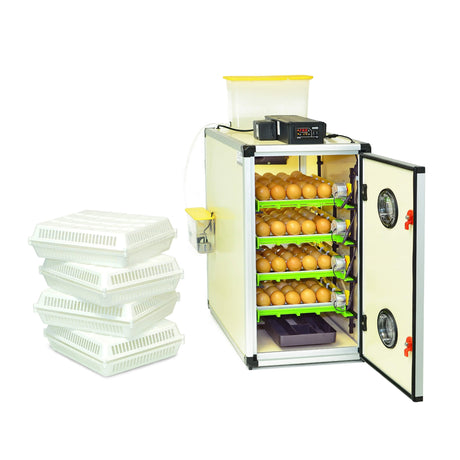
Here is an example of the transfer process using a Hatching Time CT120. The basket arrangement in the video is model-specific; use your own machine's instructions if its layout differs.
Video: Placing eggs into CT120 hatching baskets.
For repeated or overlapping batches, a hatcher-only incubator may help keep the final hatching stage separate from eggs that still need turning.
When to Remove Chicks from the Hatcher
Remove chicks when they are dry, fluffy, and moving well, while minimizing disruption to eggs that are still pipping. If a hatch is spread out, Mississippi State Extension advises carefully removing dry chicks at appropriate intervals rather than leaving them in the hatcher for days. Keep wet chicks in the warm hatcher until they dry.(5)
The goal is to avoid both chilling newly hatched chicks and dehydrating chicks that have been left in a hot hatcher too long.
How to Move Chicks to the Brooder
- Preheat and check the brooder before hatch day, using the correct settings for its heating system.
- Transfer dry, active chicks gently and keep them protected from drafts.
- Show them where the water and chick starter feed are located.
- Observe how they spread around the heat source and adjust the setup if their behavior suggests discomfort.
Once the chicks are settled, clean and disinfect the empty hatching equipment according to the manufacturer’s instructions before the next batch.
Conclusion
For chicken eggs, plan around a 21-day incubation period, stop turning around day 18, and expect the final days to involve plenty of waiting between visible signs of progress. Not every chick will pip or hatch at the same hour.
Use the temperature and humidity instructions for your exact incubator, resist unnecessary handling during active hatch, and have the brooder ready before the first chick arrives. Those preparations matter far more than trying to make every egg follow an identical clock.
References
- Mississippi State University Extension: Important Incubation Factors
- Mississippi State University Extension: Incubation Temperature Requirements
- University of Illinois Extension: Incubation and Embryology Q & A
- Virginia Tech: Chick Embryo Development
- Mississippi State University Extension: Chick Removal from Hatchery
- University of New Hampshire Extension: Brooding and Caring for Chicks