So, you've just fired up the incubator. You wait a bit for the digital display to stabilize, only to watch the temperature creep up or down by half a degree. What's the best move here? Do you tweak the dial, ignore it entirely, or grab a backup thermometer?
The truth is, developing chicks care a lot more about consistent averages than they do about you micromanaging the controls. For your typical fan-forced incubator, the sweet spot sits right around 99.5 to 100°F (which is 37.5 to 37.8°C). When it comes to humidity, you'll generally want to aim for 50 to 55% for the first 17 days. Once you hit the lockdown phase, you'll bump that up to the 65 to 70% range. Still-air incubators, on the other hand, are a slightly different beast; they almost always require a higher temperature reading taken right at the top of the eggs. Ultimately, if your specific incubator's manual contradicts these general baselines, always defer to the manual. (1)(2)(3)
This guide explains the temperature and humidity settings for each stage, where to measure them, what brief fluctuations mean, and what to check before changing the controls.
Quick Answer: Chicken Egg Incubation Temperature and Humidity
For most fan-forced chicken egg incubators, maintain approximately 99.5 to 100°F, or 37.5 to 37.8°C, during incubation.
A common starting humidity range is:
- Days 1 to 17: approximately 50 to 55%
- Days 18 to 21: approximately 65 to 70%
Stop turning the eggs on day 18. Do not automatically reduce the temperature to 98.5°F unless the instructions for your incubator or separate hatcher specifically tell you to do so.
Still-air incubators usually require a higher thermometer reading because warm air forms layers inside the machine. Measure at the height specified for your model and follow the manufacturer’s instructions. (1)(2)(3)
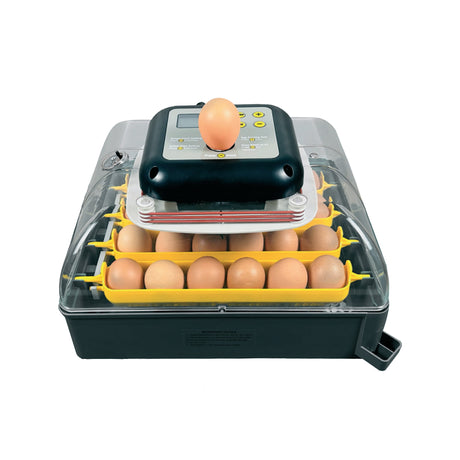
Still choosing your incubator?
Start with a small batch, or compare capacities and hatch workflows before loading your eggs.
Chicken Egg Incubation Temperature and Humidity Chart
| Incubation stage | Fan-forced incubator | Still-air incubator | Humidity starting point | What changes |
|---|---|---|---|---|
| Days 1 to 17 | 99.5 to 100°F 37.5 to 37.8°C |
Follow the model manual. Still-air units commonly require a reading 2 to 3°F higher than forced-air units. | Approximately 50 to 55% | Turn the eggs and monitor embryo and air cell development. |
| Days 18 to 21 | Continue the model’s recommended setpoint unless its hatching instructions specify otherwise. | Follow the model manual and keep the thermometer at the required height. | Approximately 65 to 70% | Stop turning, increase humidity, keep ventilation open, and avoid unnecessary opening. |
These figures are starting ranges, not a reason to override your manufacturer’s instructions. Incubator design, room conditions, sensor placement and egg moisture loss all affect the readings. Illinois Extension gives approximately 50 to 55% relative humidity as a common incubation range, while Mississippi State guidance uses approximately 58 to 60% before hatch. Compare several eggs’ air cells rather than relying on one percentage alone. (1)(2)(3)
Before You Set the Eggs
Start the clean incubator before setting the eggs. Give it enough time to reach stable conditions and to show whether the built-in display agrees with a separate thermometer and hygrometer. Extension guidance ranges from one or two days to about a week of preparation, depending on the equipment and setting. (2)(3)
Place the incubator indoors on a stable surface, away from direct sunlight, drafts, exterior doors and heating or cooling vents. A room that changes dramatically between day and night makes the incubator work harder.
Set only clean, intact hatching eggs. Avoid washing dirty hatching eggs because washing can remove the shell’s protective coating and may help bacteria pass through its pores. Let stored eggs warm gradually before placing them in the incubator. (2)
If you are still selecting equipment, compare egg incubators by capacity, automation and hatch workflow before beginning the cycle.
Forced-Air vs Still-Air Incubators
Before deciding that a temperature is too high or too low, check which type of incubator you are using.
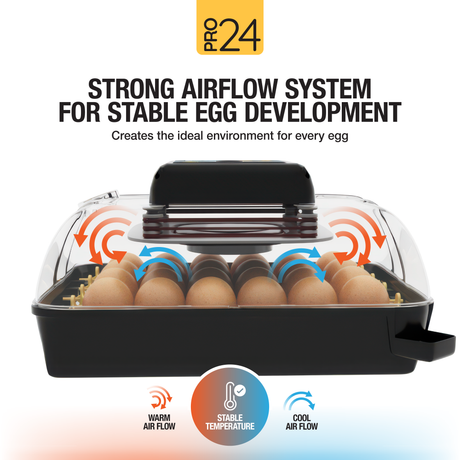
Fan-forced incubators use a fan to circulate warm air. This produces a more even temperature throughout the machine. A target around 99.5 to 100°F, or 37.5 to 37.8°C, is commonly used for chicken eggs.
Still-air incubators do not have a circulation fan. Warm air rises, so temperature changes with height inside the machine. Mississippi State guidance adds 2 to 3°F to the forced-air setting for a still-air unit. Thermometer placement is therefore critical and should follow the instructions for the exact model. The sensor must not touch an egg or the side of the incubator. (1)(2)
This difference is why a single temperature recommendation cannot be applied to every incubator without knowing its design.
| Feature | Fan-forced incubator | Still-air incubator |
|---|---|---|
| Air movement | A fan circulates warm air. | There is no internal circulation fan. |
| Temperature distribution | More even throughout the machine. | Warmer toward the top, so sensor height matters. |
| Typical chicken egg setting | Around 99.5 to 100°F. | Commonly 2 to 3°F higher than the forced-air recommendation, depending on the model. |
| Thermometer placement | Near egg level, following the manual. | At the exact height specified by the manufacturer. |
| Main measurement risk | Trusting one poorly placed or unverified sensor. | Measuring too low or too high inside the incubator. |
Where to Place and Check the Thermometer
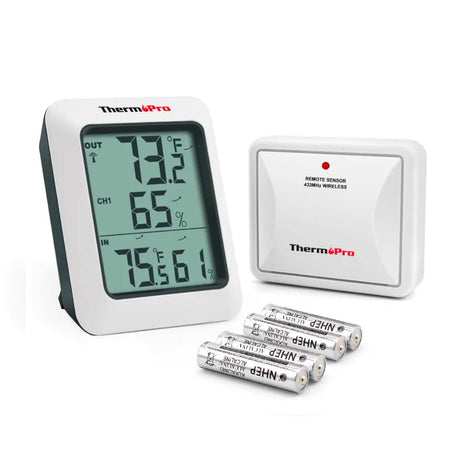
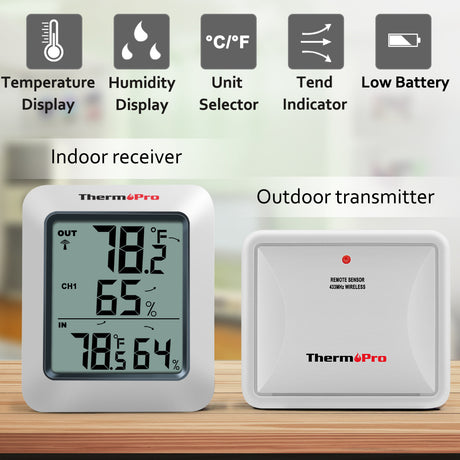
Your incubator display tells you what its built-in sensor is reading. A separate thermometer gives you a second point of comparison.
Position the independent sensor near egg level, away from the incubator wall, direct heat and water. It should not touch an egg. After the incubator has stabilized, compare the two readings and record the difference.
Do not recalibrate the incubator after one brief mismatch. First check:
- whether both sensors are at a comparable height
- whether the incubator has fully stabilized
- whether one sensor sits near a fan, heater, wall or water source
- whether the manufacturer provides a calibration procedure
If the readings continue to disagree, follow the model manual or contact product support before making a large correction. (2)(3)
Need a second temperature and humidity reading?
Use an independent instrument to compare the conditions near the eggs with the incubator display.
How Humidity and Air Cell Development Work Together
Humidity controls how quickly moisture leaves the egg through the shell. As moisture is lost, the air cell at the large end gradually becomes larger.
Too much humidity can slow moisture loss and leave the air cell smaller than expected. Too little humidity can cause the air cell to grow too quickly. The incubator percentage gives you one measurement, while candling shows you how the eggs are responding.
Compare several eggs at planned checkpoints, commonly around days 7, 14 and 18. Do not change the incubator because one egg looks unusual. Shell thickness, egg size, storage history and natural variation can all affect the air cell. (2)(4)
Our egg candling guide shows how air cell development and embryo growth may appear across the hatch.
Why Stable Temperature Matters
A brief temperature change is not the same as an incubator remaining too warm or too cool for several hours.
Opening the lid, adding water or moving an external sensor can cause a temporary change. Give the incubator time to recover before repeatedly adjusting the setpoint. Constant corrections can create a larger swing than the original change.
Prolonged high temperature is generally more dangerous than a short cool period. A machine that runs consistently warm may produce an early hatch, while a consistently cool machine may delay development and hatch timing. Both can reduce hatch success. (1)(2)(3)
Look for patterns:
- Is the average reading drifting over several hours?
- Do the built-in and independent sensors agree?
- Is direct sunlight reaching the incubator?
- Has the room temperature changed sharply?
- Is a door, lid or vent out of position?
Chicken eggs commonly hatch at around 21 days, but slightly early or late hatches can occur. Review the full chicken egg hatching timeline before assuming a day-21 egg has failed.
Ventilation During Incubation
Developing embryos exchange oxygen and carbon dioxide through pores in the shell. Their oxygen demand increases as they grow, especially near hatch.
Keep ventilation openings clear and follow the incubator manual for vent adjustment. Do not close the vents simply to force the humidity upward. That may raise moisture while reducing the fresh air available to the chicks.
During lockdown, humidity and ventilation must work together. Add water through the incubator’s normal system, increase exposed water surface area if the manual recommends it, and keep the required air openings unobstructed. (1)(2)
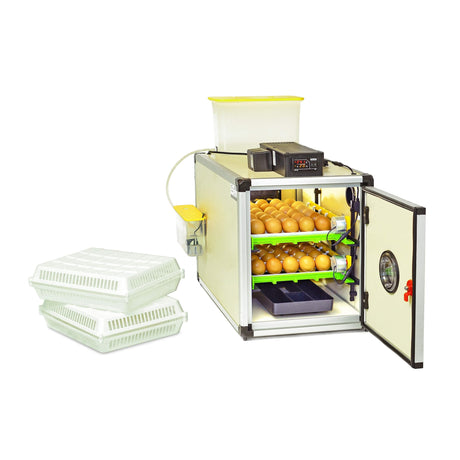
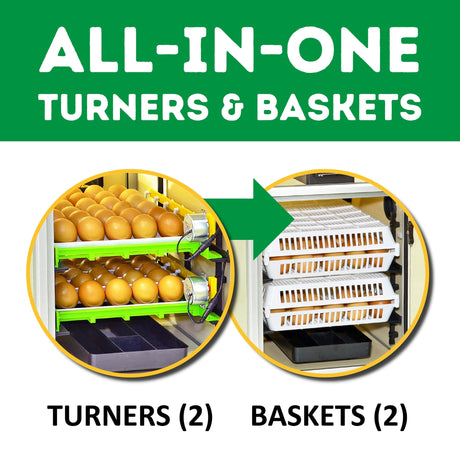
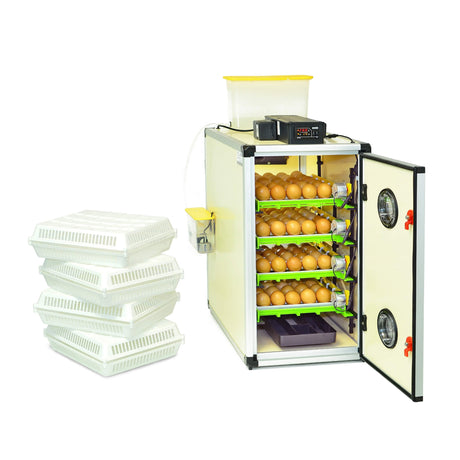
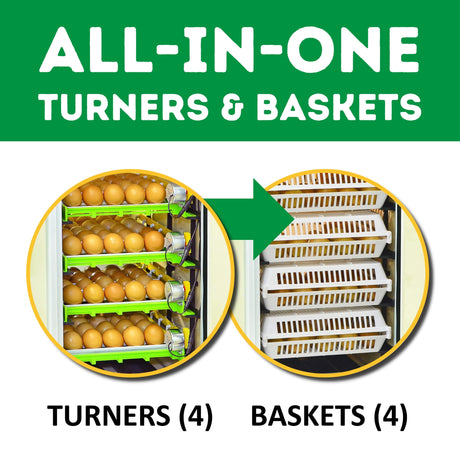
When More Automated Equipment May Help
Automatic temperature control, humidity monitoring, alarms and egg turning can reduce repetitive handling, but they do not make incubation completely hands-off. You still need to confirm the readings, check water levels, review egg development and prepare correctly for lockdown.
Automation becomes particularly useful when:
- you cannot turn eggs manually several times each day
- you hatch repeated or overlapping batches
- you need alarms for temperature or humidity changes
- you are moving from a small tabletop batch to a larger cabinet workflow
Before loading a valuable or large batch, run the incubator empty and consider a small test hatch. A recent real-world CT180 test hatch used this approach to check the machine, turning system and humidity workflow before a larger production cycle.
What to Do When Temperature or Humidity Is Wrong
| What you notice | Check first | What to do next |
|---|---|---|
| Temperature appears too high | Compare with an independent thermometer near egg level. | Check direct sunlight, room heat, sensor placement and the model manual before recalibrating. |
| Temperature appears too low | Confirm the reading with a second sensor. | Check the lid, door seal, power supply, room temperature and heating system. |
| Built-in display and separate thermometer disagree | Sensor height and location. | Let both stabilize in comparable positions, then follow the model’s calibration procedure. |
| Humidity will not rise | Water level and exposed water surface. | Use the normal humidity system and keep the required ventilation open. |
| Heavy condensation develops | Humidity level and ventilation. | Check the manual, reduce excess water if necessary, and confirm that vents are not blocked. |
| Hatch begins noticeably early | The average temperature may have been high. | Review the recorded temperature across the full cycle instead of one current reading. |
| Hatch is delayed | The average temperature may have been low. | Continue monitoring viable eggs and review the full hatch timeline. |
| One area of the incubator reads differently | Airflow, fan operation and sensor placement. | Check tray position, loading density and whether the machine has fully stabilized. |
Still seeing unstable readings after checking the setup?
Choose the path that matches the problem you are trying to solve.
Turning and Candling
When to Turn Chicken Eggs
Chicken eggs should be turned during the first 18 days so the developing embryo does not remain in one position against the shell membrane.
If you turn the eggs manually, turn them at least three times each day and handle them gently. If your incubator turns automatically, confirm that the trays move correctly during the test run. Stop turning on day 18 as the chicks move into hatching position. (1)(2)(3)
For egg placement, manual and automatic turning, and when to stop, see our guide to properly incubating poultry eggs.
When to Candle Chicken Eggs
Candling allows you to compare embryo growth and air cell development without opening the egg.
Useful chicken egg checkpoints include approximately days 7, 14 and 18. Work quickly, take out only a few eggs at a time, and return uncertain eggs for another comparison rather than removing them after one unclear view. (2)(3)(4)
See the day-by-day egg candling guide for developing embryos, clear eggs, blood rings and late-stage uncertainty.
Lockdown Temperature and Humidity: Days 18 to 21
Lockdown usually begins on day 18 for chicken eggs.
At this point:
- stop turning the eggs
- remove automatic turning equipment if the model requires it
- move eggs into the hatching position or basket
- raise humidity to approximately 65 to 70%
- keep the required ventilation openings clear
- avoid routine candling and unnecessary opening
Do not automatically lower every incubator to 98.5°F. Some separate hatching units may operate approximately one degree below their incubation temperature, but this depends on the machine. Continue with the temperature specified for your model unless its hatching instructions say otherwise. (1)(2)
The chick will move toward the air cell, pip internally, rest, pip through the shell and eventually begin zipping. This may take longer than expected. Check when to help a chick hatch before opening or assisting a pipped egg.
Post-Hatch Care and Incubator Cleanup
Leave newly hatched chicks in the incubator until they are dry and fluffy. Opening the machine repeatedly while other eggs are pipping can release the humidity they still need.
Move the dry chicks to a clean, preheated chick brooder with water and appropriate starter feed. The brooder should be ready before the first chick hatches. Our guide to setting up a chick brooder covers the next stage.
After the hatch is complete, unplug the incubator and remove shells, debris and unhatched eggs. Clean and disinfect the machine according to its manual, allowing every component to dry before storage or the next batch. (2)

Common Chicken Egg Incubation Mistakes
Most temperature and humidity problems do not begin with one dramatic mistake. They come from several small decisions repeated across the hatch.
Common problems include:
- using a still-air temperature in a fan-forced incubator, or the reverse
- measuring temperature at the wrong height
- trusting one unverified sensor
- reacting to every brief display movement
- placing the incubator in sunlight or a draft
- closing vents to increase humidity
- changing humidity after looking at only one egg
- lowering the lockdown temperature without checking the model instructions
- opening the incubator repeatedly while chicks are pipping
Keep a simple hatch record with the date, temperature, humidity, candling observations and hatch timing. Those notes make it much easier to identify a genuine pattern before the next batch. (1)(2)
Temperature and humidity numbers are useful, but they only make sense when you know where the sensors are, which type of incubator you have and how the eggs are responding.
Start with the range recommended for your model. Verify it with a second instrument, watch the air cells across several eggs, and avoid changing the controls after every small movement on the display. A stable routine and good records will tell you far more than one isolated reading.
References
- Mississippi State University Extension Service. “Important Incubation Factors.” https://extension.msstate.edu/agriculture/livestock/poultry/important-incubation-factors
- Mississippi State University Extension Service. “Hatching Quality Chicks.” https://extension.msstate.edu/publications/hatching-quality-chicks
- Illinois Extension. “Incubation and Embryology Q & A.” https://extension.illinois.edu/incubation-and-embryology-q
- Mississippi State University Extension Service. “The Avian Embryo.” https://extension.msstate.edu/publications/the-avian-embryo
Written by:

Aryeh Wiesel