Table of Contents
- How to Manage a Chicken Coop Long-Term
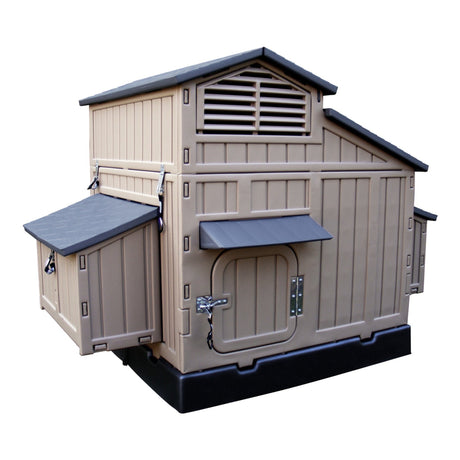
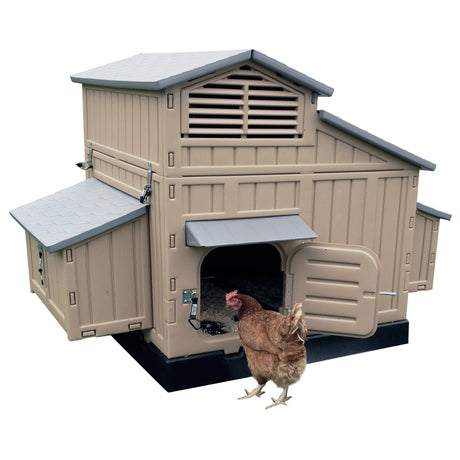
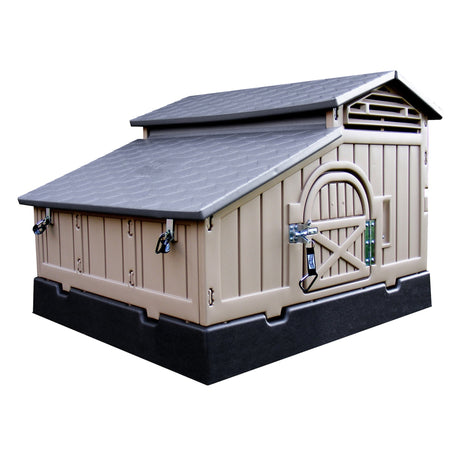
- Chicken Coop Setup and Design
- Predator-Proofing Your Chicken Coop
- Ventilation and Insulation
- Best Chicken Coop Bedding Materials
- Cleaning and Sanitization Routine
- Nesting Boxes, Perches, and Enrichment
- Seasonal Coop Adjustments
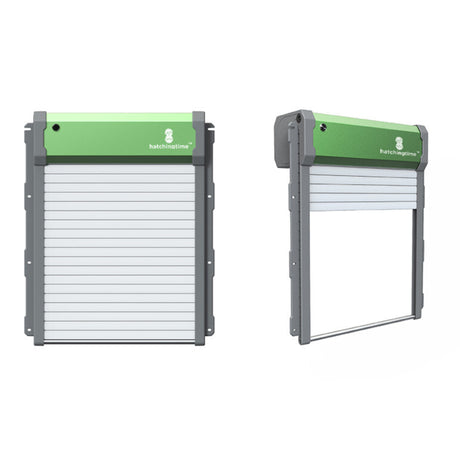
- Chicken Coop Automation
- Common Chicken Coop Problems
- Chicken Coop Management FAQs
Has your chicken coop started feeling like a list of small jobs that never quite ends?
Maybe the waterer leaks into one corner of the bedding. Maybe the run gate has begun dragging, so it no longer closes properly. Or perhaps you keep meaning to deal with the damp patch under the perch, the loose wire, or the ammonia smell, but there is always something else to do first.
That is how most coop problems begin. They rarely arrive as one dramatic event. They build through small things that were easy to ignore for a few days, then a few weeks, until the coop becomes harder to clean, the flock gets stressed, and you are suddenly trying to fix several issues at once.
Your chickens eat, sleep, lay, drink, and rest in that one structure every day. The air they breathe, the condition of the bedding, the room they have to move around, and the security of the run all affect how manageable your flock becomes. Poor coop conditions can make sanitation harder, increase stress, and make consistent egg production more difficult to maintain.
I think this is where many chicken keepers get caught out. They put real thought into choosing birds and setting up a coop, then assume the difficult part is over. But a coop needs ongoing management because your flock, your weather, and your routine will keep changing around it.
Chicken Coop Management at a Glance
- Start with water: A leaking or dirty waterer can create bedding, odor, and health problems quickly.
- Keep moisture under control: Dry bedding and upper ventilation matter in every season.
- Check security routinely: Latches, wire, run covers, and perimeter gaps all need regular attention.
- Give birds usable space: Enough room makes cleaning, feeding, flock behavior, and seasonal care easier.
- Use automation selectively: It should remove a recurring problem, not hide one.
How to Manage a Chicken Coop Long-Term
Good coop management is mostly repetitive, which may not sound exciting, but is exactly why it works. Healthy flocks usually come from simple routines carried out often enough that small problems never get a chance to become expensive ones.
I would start each morning with the waterer. Check that the water is clean, available, and not leaking into the litter. Chickens need steady access to fresh water, especially during hot weather, when they drink more and cool themselves through panting [1].
Then collect eggs and look at the flock before you leave the coop. You are not trying to diagnose every chicken in thirty seconds. You are simply noticing what looks different: a bird standing apart from the others, a hen spending too long in a nesting box, a chicken that suddenly looks hunched, quiet, or reluctant to move. Review our Coop Additives products for a healthy coop management.
| Frequency | What to Check | Why It Matters | What to Do |
|---|---|---|---|
| Daily | Water, eggs, flock behavior, wet bedding, doors and latches | Leaks, illness, broken eggs, and predator access are easier to handle early | Refill or clean water, collect eggs, remove wet litter, and secure the coop before dark |
| Weekly | Perches, nesting boxes, feeder area, wire, run perimeter | Mites, spilled feed, damp litter, damaged mesh, and digging activity build gradually | Refresh bedding, wash waterers, inspect hardware, and look for gaps or loose sections |
| Monthly | Wood condition, roof edges, drainage, mold, rodent activity | Small repairs are easier before rain, pests, or rot turn them into structural problems | Repair loose parts, clean feeders properly, improve drainage, and store feed securely |
| Seasonally | Ventilation, insulation, run condition, bedding supply, shade and water setup | Your flock's needs change with heat, humidity, rain, cold, and reduced daylight | Deep clean, adjust airflow, prepare for temperature changes, and reassess your setup |
Every week, remove wet or heavily soiled bedding, check the feeder and waterer area, inspect the joins on perches and nesting boxes for mites, and walk the outside of the run. A hole that was not there last week did not appear by accident.
Seasonally, the priorities shift. Spring is a good time for a proper clean and ventilation check. Summer is about water, shade, airflow, and keeping the ground around drinkers from becoming a damp mess. Fall is when you find out whether you have enough bedding, drainage, and weather protection before winter arrives.

Chicken Coop Setup and Design That Supports Easier Management
How Much Space Do Chickens Need?
A practical starting point is at least 4 square feet of indoor coop space per bird and 8 to 10 square feet per bird in the run. University of Minnesota Extension recommends 3 to 5 square feet of indoor space per bird, while UF/IFAS recommends at least 3 square feet indoors and 8 to 10 square feet in the outdoor run [1][2].
I would treat those numbers as a minimum, not a target. Extra room gives you options. You can separate food and water from the bedding, add another perch, move a waterer away from the nesting boxes, or give lower-ranking birds somewhere to step away from a pushier flock mate.
Six hens need at least 24 square feet inside the coop. Thirty to 36 square feet is often easier to manage because perches, nesting boxes, feeders, and waterers take up more usable floor space than people expect.
Fixed Coops vs. Mobile Coops
- Fixed coops are usually easier to insulate, secure, and automate. They suit larger flocks, permanent runs, cold climates, and areas with serious predator pressure.
- Mobile coops or chicken tractors can work well for smaller flocks when you are able to move them regularly. They help spread manure over a wider area and give birds access to fresh ground.
- Raised coops can help on damp ground, but the space beneath them must still be secure from predators and rodents.
Mobile coops are not automatically easier. UF/IFAS notes that they can help distribute manure but may also make birds more vulnerable to digging predators and spread pathogens more widely if they are moved across the property without a plan [2].
I would only choose a mobile setup if moving it regularly fits your actual routine. A chicken tractor that stays in the same muddy patch for months has most of the inconvenience and few of the benefits.
Build or Buy?
Building your own coop gives you control over dimensions, airflow, access doors, perch placement, nesting boxes, and hardware. Buying can still be the better decision if you need a faster setup or do not want a major building project in the backyard.
Either way, be skeptical of the chicken capacity printed on the product page or packaging. Check the floor dimensions, then account for perches, nesting boxes, feeders, waterers, and the fact that chickens do not use every inch of space evenly.
Browse chicken coops and grow-out pens by actual dimensions and flock stage, not only by the advertised bird count.
Predator-Proofing Your Chicken Coop
A predator-proof coop needs secure wire, protected edges, dependable latches, and a door that closes when it should. I would start with the boring parts because they are usually where losses happen: a weak latch, a small gap beneath the run, chicken wire used where hardware cloth was needed, or a coop door that did not get shut before dark.
Raccoons can manipulate simple latches. Weasels can get through gaps that look too small to matter. Hawks and owls can target birds in open runs. Dogs can also cause serious damage very quickly when the run is not secure.
The four things I would check first: wire, gaps, latches, and the run cover. Everything else comes after those.
- Use hardware cloth where predators can reach the coop or run. Chicken wire helps keep chickens inside, but it is not reliable predator protection. Hardware cloth has tighter spacing and is better suited to smaller predators [2].
- Add a predator apron. Bury hardware cloth 12 to 18 inches around the perimeter, or extend it outward in an L-shape at ground level to discourage animals that dig under the run [2].
- Use latches that take more than one simple movement to open. A basic hook is easy for an animal to test.
- Cover the run where aerial predators are a risk. The cover can be mesh, wire, or another secure material suited to your setup.
For a deeper look at materials, barriers, and common predator risks, read How to Predator Proof Your Chicken Coop.
An automatic coop door can help with one very common problem: forgetting to close the flock in before dark. It cannot repair weak wire or an uncovered run, but it can make the evening lock-up more reliable on busy days.

Chicken Coop Ventilation and Insulation
Ventilation removes damp air from the coop. Insulation can help manage cold weather. They are related, but they are not the same job.
I think many keepers overfocus on keeping the coop warm and underfocus on keeping it dry. Chickens create moisture through breathing and droppings, and that moisture has to leave the coop. When it cannot, litter stays wet longer, odors build up, condensation appears, and cleaning becomes a constant fight.
The goal is fresh air without a cold draft blowing across roosting birds. A useful practical rule is to place ventilation high and protect birds from drafts lower down.
Signs Your Coop Has a Moisture Problem
- Condensation on walls, windows, or the underside of the roof
- Damp litter that does not dry out between cleanings
- A persistent ammonia smell
- Mold on bedding, wood, or around roof and window edges
- Wet patches around waterers or beneath roosts
- Birds avoiding one specific area of the coop
Vents near the roofline allow warm, moist air to rise and leave the coop. Gaps around lower wall joints, doors, and roost-level areas are more likely to create drafts where birds actually sleep.
If you are adding insulation, start with the ceiling. Any foam board or exposed insulation should be covered with a solid material such as plywood so chickens cannot peck at it.
A thermometer and hygrometer can help, but I would not chase one perfect humidity number. Damp litter, condensation, mildew, and ammonia smell tell you far more about whether the coop is coping with its moisture load.
Best Chicken Coop Bedding Materials
The best bedding depends on your climate, ventilation, cleaning routine, and coop floor. There is no single answer that works for every flock, which is why I would choose bedding based on what your setup actually struggles with.
| Bedding Material | Best For | Strengths | Watch Outs |
|---|---|---|---|
| Pine shavings | Most standard chicken coops | Absorbent, easy to compost, widely available, simple for regular cleanouts | Can become dusty when extremely dry and needs replacing when wet |
| Straw | Cold weather and winter layering | Adds insulation and gives birds something to scratch through | Holds moisture more easily and can become messy in damp coops |
| Sand | Covered runs and dry climates | Fast spot cleaning and lower moisture retention than organic bedding | Offers little insulation and is not ideal for every coop floor or climate |
| Deep litter | Keepers willing to manage a composting system consistently | Can reduce full cleanouts and generate some warmth when managed well | Needs dry litter, regular turning, added bedding, and good ventilation |
Does the Deep Litter Method Work?
It can, but it is not a reason to stop paying attention to the coop. University of Minnesota Extension describes deep litter as a composting approach where bedding is built up, turned regularly, and added to over time. Once it reaches enough depth, composting can generate warmth and reduce harmful bacteria [1].
I would not use deep litter in a coop that already struggles with leaks, poor airflow, or wet ground. If the bedding smells sour, stays clumped, attracts flies, or feels wet underfoot, the system needs a reset rather than another layer of bedding.

Chicken Coop Cleaning and Sanitization Routine
A coop does not need to look showroom-clean. It does need to stay dry, reasonably odor-free, and easy for chickens to use.
Daily and Weekly Cleaning Tasks
- Collect eggs and remove broken shells.
- Check waterers for leaks, slime, and low water levels.
- Remove wet litter around waterers and beneath high-traffic areas.
- Clean spilled feed before rodents decide the coop is a useful food source.
- Refresh nesting-box material when it becomes dirty or flattened.
- Wash feeders and waterers thoroughly each week, not only when they look empty.
Seasonal Deep Cleaning
- Remove old bedding completely.
- Scrub perches, nesting boxes, walls, and feeder areas.
- Allow the coop to dry fully before adding fresh bedding.
- Inspect wood for moisture damage and hardware for rust.
- Check hinges, latches, roof edges, wire, and the run perimeter.
University of Minnesota Extension recommends regular cleaning and disinfection of feeders and waterers, along with thorough annual coop cleaning [1].
I would fix a water leak, drainage issue, or ventilation problem before buying coop additives. Food-grade diatomaceous earth, enzyme products, and odor-control powders may have specific uses, but none of them can make a wet coop behave like a dry one.
Chicken Nesting Boxes, Perches, and Enrichment
Nesting Boxes
One nesting box for every four to five hens is a useful starting point. Your chickens may still decide that one particular box is the only acceptable place to lay. That is normal. The aim is to give them enough clean, private, accessible options so they do not start laying on the floor or in places you cannot easily reach [1][2].
- Place nesting boxes lower than roosting perches.
- Keep nesting material clean and dry.
- Use boxes around 12 by 12 inches for standard breeds.
- Choose roomier boxes for larger breeds when possible.
- Keep the area reasonably private and away from busy traffic.
If a hen starts spending an unusual amount of time in the nest, read How to Tell If a Hen Is Broody.
Perches
Allow roughly 8 to 12 inches of perch space per bird. Flat perches around 2 to 4 inches wide give chickens a steadier place to stand than narrow round dowels, especially when they are sleeping for hours at a time.
Leave enough room above the highest perch for birds to stand comfortably. If you use more than one perch level, stagger them rather than placing one directly above another. Lower birds should not spend the night beneath the droppings of birds above them.
Enrichment and Flock Behavior
Feather pecking, egg eating, and aggression do not have one simple cause. Boredom can be part of the problem, but so can crowding, poor feed access, parasites, nutrition, flock hierarchy, and a run that does not give birds enough to do.
I would look at the environment before blaming one chicken.
- Does every bird have enough access to food and water?
- Are there enough perches and places to move away from dominant birds?
- Is the run bare, muddy, or too small for the flock?
- Could mites or other parasites be irritating the birds?
- Are some hens being cornered around feeders or nesting boxes?
Dust baths are part of normal chicken behavior and can help birds manage mites. A dry container or sheltered run corner filled with soil and sand gives chickens a reliable place to dust bathe [1].
Other simple enrichment ideas include hanging leafy greens, scattering a small amount of scratch grain through bedding, adding low platforms or stumps, and rotating safe objects into the run occasionally. Chickens do not need an elaborate activity plan. They need space, dry ground, and reasons to scratch, peck, perch, and move around.
Seasonal Chicken Coop Adjustments
| Season | Primary Risk | What to Focus On | What I Would Check First |
|---|---|---|---|
| Spring | Damp ground, roof leaks, mud, pests | Deep cleaning, drainage, ventilation, run repairs | Wet bedding, gaps in the run, damaged roof edges, standing water |
| Summer | Heat stress and low water | Shade, airflow, cool water, dry ground around drinkers | Water supply, panting birds, crowded shade areas, overheated coop walls |
| Fall | Poor preparation for cold and rain | Bedding supply, drainage, door seals, upper ventilation | Roof leaks, blocked vents, loose latches, muddy run entrances |
| Winter | Moisture, frozen water, drafts | Dry bedding, upper airflow, water access, frostbite checks | Condensation, frozen drinkers, damp litter, drafts at roost level |
Winter Coop Care
Winter management is mostly about keeping birds dry, ventilated, and protected from strong drafts. Many medium and large chicken breeds handle low temperatures well when they are dry and acclimated to the conditions [1].
I would not seal every opening in winter simply because the forecast says cold weather is coming. Keep upper ventilation open, block drafts at bird level, check water more often during freezes, and watch combs and wattles for frostbite.
Summer Coop Care
Summer brings a different set of problems. Heat can affect chickens quickly, particularly when high temperatures arrive with humidity.
- Panting
- Wings held away from the body
- Lethargy or reduced movement
- Birds crowding into the smallest available shade patch
- Waterers running low faster than usual
Shade, moving air, and clean, cool water do most of the work. Frozen fruit or vegetables can be a useful occasional treat, but I would treat them as enrichment, not heat management. Chickens need reliable water access in hot weather because they cool themselves through panting [1].
Chicken Coop Automation That Actually Helps
Automation works best when it removes a recurring problem from your routine. I would not buy an automated product because it sounds clever. I would ask which job keeps getting missed, rushed, or made harder by your schedule.
- Automatic coop doors: Useful for people who are not always home before dark.
- Automatic water systems: Reduce daily refilling and make it easier to focus on water quality.
- Heated water bases: Can help prevent freezing when installed and monitored correctly.
- Rodent-resistant feeders: Can reduce spilled grain and make the coop less attractive to rats and mice.
- Coop cameras: Helpful for checking doors, flock activity, and possible predator movement.
Automatic doors are especially useful because they reduce the chance of forgetting the evening lock-up. For water systems, read The Future of Flock Hydration: Benefits of Automatic Poultry Waterers, then compare feeders and waterers based on your flock size, climate, and existing setup.

Common Chicken Coop Problems and What to Check First
| Problem | What to Check First | Likely Cause | Practical Fix |
|---|---|---|---|
| Ammonia smell | Wet litter, leaking waterer, blocked upper vents | Too much moisture and poor airflow | Remove wet bedding, fix leaks, and improve upper ventilation |
| Damp bedding or mold | Roof leaks, drainage, run splashback, water placement | Moisture entering faster than the coop can dry | Find the source, replace wet bedding, and improve drainage or airflow |
| Feather pecking or fighting | Space, feeders, perches, parasites, flock changes | Crowding, resource guarding, boredom, hierarchy, or irritation | Increase access points, add enrichment, check health, and reassess flock space |
| Dirty or broken eggs | Nesting material, roosting in boxes, egg collection schedule | Dirty boxes, crowded nesting areas, or eggs left too long | Refresh nesting material, adjust perch height, and collect eggs more often |
| Rodents | Spilled grain, open feed bins, coop clutter, entry gaps | Easy access to food, shelter, and water | Store feed securely, clean spills, remove clutter, and close gaps |
| Predator damage | Latches, wire, apron, run cover, coop door schedule | Weak access point or delayed lock-up | Upgrade the weak point and inspect the full perimeter before adding new birds |
Final Thoughts
Chicken coop management gets easier when you stop seeing it as one large job. It is a collection of small decisions: whether the waterer is leaking, whether the bedding is drying, whether the birds have room, whether the latch still works, and whether you noticed the problem early enough to fix it calmly.
I would focus first on space, moisture, water, and predator protection. Those four areas affect nearly everything else. Once they are under control, better nesting boxes, automation, upgraded feeders, and other additions become genuinely useful instead of expensive ways to avoid a basic problem.
A well-managed coop gives you cleaner eggs, calmer birds, fewer unpleasant surprises, and a setup that still works after the first exciting months of chicken keeping are long gone.
References
- University of Minnesota Extension: Raising Chickens for Eggs -https://extension.umn.edu/small-scale-poultry/raising-chickens-eggs
- University of Florida IFAS Extension: Raising Backyard Chickens for Eggs -https://ask.ifas.ufl.edu/publication/AN239