
Table of Contents
- What Is Egg Candling?
- How to Candle Eggs Safely
- When Should You Start Candling Eggs?
- Candling Chicken Eggs: Day 1 to Day 21 Chart
- Egg Candling Decision Table: What to Do Next
- Fertile Egg Candling: Signs of Normal Development
- Infertile Egg Candling: What It Looks Like
- Dead Egg Candling: Blood Rings and Stopped Development
- What Egg Candling Can and Cannot Tell You
- What the Air Cell Can Tell You
- Candling Quail, Duck, Turkey and Goose Eggs
- Common Egg Candling Mistakes
- Last Words
Quick answer: Candle chicken eggs around days 7, 14, and 18. A developing egg usually shows branching blood vessels and a growing dark embryo, while an infertile egg stays mostly clear. If the view is uncertain, mark the egg, return it to the incubator, and compare it again in two or three days.
I’m sure everyone has stood in front of their incubator, staring at a smooth shell, wondering if anything is actually happening inside. It is really frustrating. Egg candling gets confusing at the exact point when it should become useful. You shine a light through the shell, see a weird shadow or a few faint veins, and then you have to figure out what the image means. Is the embryo developing normally? Is it infertile? Has development stopped, or is the shell simply too dark to read clearly?
A useful candling check has to end with a sensible next step, not a rushed guess. This guide explains when to candle eggs, what you might see at each stage, and when an uncertain egg should just go back into the incubator for another look.
What Is Egg Candling?
Egg candling is basically the process of shining a concentrated light through an eggshell so you can see the air cell, blood vessels, embryo, and other internal details without cracking it open. Poultry keepers use it to check whether an egg is actually developing, follow its progress, and spot eggs that might be infertile or no longer viable.
The name comes from the old days, when a candle supplied the light. A modern egg candler or bright LED flashlight is much safer, brighter, and easier to control. But candling is still a visual check through a solid shell. Shell color, egg size, the strength of the light, and the stage of incubation can completely change what you are able to see.

How to Candle Eggs Safely
You need a dark room, a focused light source, and clean, dry hands. That is really it. A dedicated egg candler gives you the clearest beam, though a strong LED flashlight can work well enough for light-colored shells.
- Darken the room so outside light does not compete with the candler.
- Take out only a few eggs at a time.
- Hold the large end of the egg against the light. This is exactly where the air cell forms.
- Tilt the egg gently until you can see the veins, embryo or air cell.
- Avoid shaking, spinning or repeatedly flipping the egg.
- Return it to the incubator as soon as you finish.
Illinois Extension advises keeping eggs out of the incubator for no more than about five to ten minutes (1). Honestly, you rarely need that long when the room and candler are ready before you begin.
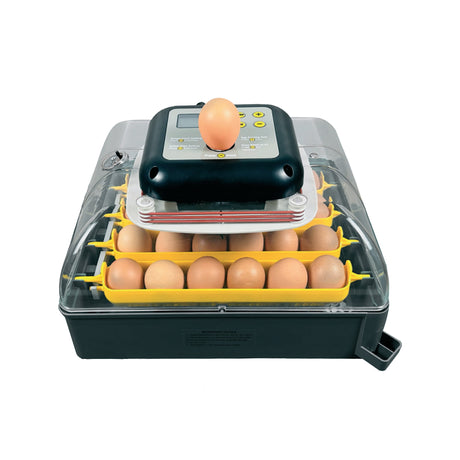
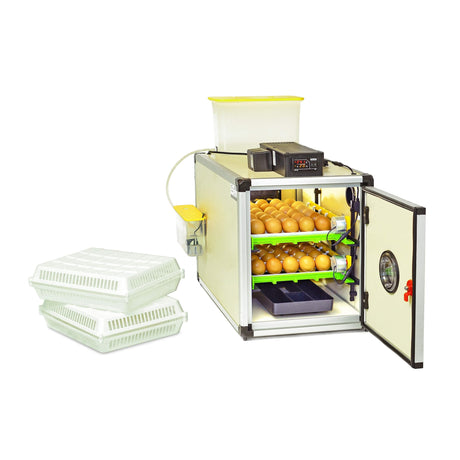
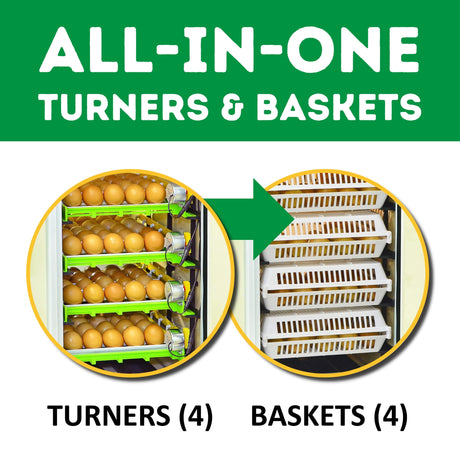
If you are handling a larger batch, work in tray order. Record the tray and egg position before moving on. Mark uncertain eggs lightly with a pencil, then return them to the exact same place. That simple routine keeps a 60, 120, or 180-egg candling session from turning into a total memory test. If you regularly work with batches that size, compare our automatic egg incubators and hatchers by tray capacity and access before choosing your setup.
When Should You Start Candling Eggs?
Chicken eggs can usually be candled once early development starts to show, commonly between days 5 and 7. Mississippi State Extension places the normal first check at about four to seven days (2). Dark brown or heavily speckled shells might need a little more time simply because the shell blocks more light.
- Around day 7: Confirm early development and look for blood vessels.
- Around day 14: Check the growth, look for movement, and review air cell development.
- Around day 18: Make a final check before lockdown, if needed.
You absolutely do not need to candle every day. Daily handling adds very little useful information, and it gives you more chances to cool, jar, or misread an egg. The difference between two planned checks is often way more useful than one isolated view.
Candling Chicken Eggs: Day 1 to Day 21 Chart
The exact view varies from egg to egg. White shells show detail earlier, while dark brown or speckled eggs can easily hide an embryo that is actually developing normally.

| Stage | What you may see | What it usually means | What to do |
|---|---|---|---|
| Days 1-3 | Mostly yolk shadow and a bright interior | Usually too early to assess reliably | Wait |
| Days 4-6 | Small dark point with fine branching vessels | Early embryo development | Return and recheck later |
| Day 7 | Clearer vein network, dark embryo, possible movement | Normal early development | Continue incubation |
| Days 8-10 | Larger dark area and stronger vessels | Growth is progressing | Continue incubation |
| Days 11-14 | Embryo fills more space; air cell is easier to see | Normal mid-incubation growth | Compare the air cell |
| Days 15-17 | Most of the egg appears dark | The chick is taking up more space | Do not panic just because you can see less |
| Day 18 | Mostly dark egg with a defined air cell | Normal late development before lockdown | Stop turning and prepare for hatch (4) |
| Days 19-21 | Egg is largely dark; movement may be hard to see | Positioning, internal pipping or rest | Avoid routine candling during lockdown (4) |
This chart describes common chicken egg development, not a strict pass-or-fail test. An egg can look slightly ahead or behind without being doomed. Incubator temperature, shell color, and even your viewing angle all change the picture.
Egg Candling Decision Table: What to Do Next
Seeing something is the easy part. Deciding what to do with it is where most mistakes happen.
| What you see | What it may mean | Confidence | What to do next |
|---|---|---|---|
| Clear egg during an early check | Too early or infertile | Low to medium | Mark it and recheck in two or three days |
| Fine branching veins | Developing embryo | High | Return it to the incubator |
| Dark spot with movement | Normal development | High | Put it back and let it keep developing |
| Distinct ring with no healthy branching vessels | Possible early embryo death | Medium to high | Compare again if the view is unclear |
| Dark egg with little late-stage detail | Normal late growth, dark shell or stopped development | Low | Check timing, air cell and change since the last check |
| Cracked, leaking or foul-smelling egg | Contamination or spoilage | High | Remove it carefully from the incubator |
When the result is unclear, use a simple method: mark, return, and recheck. Write the date or a small symbol in pencil, put the egg back, and compare it with the next view. A single unclear image is very weak evidence. A lack of progress across two separate checks tells you much more (2).

Fertile Egg Candling: Signs of Normal Development
A fertile egg usually develops a clear network of branching blood vessels around a dark embryo. As incubation continues, that dark area grows. The vessels become easier to trace, and movement may actually become visible (2).
- Branching, well-defined blood vessels
- A darkening embryo
- Movement during some checks
- A gradually enlarging air cell
- More of the egg becoming dark as hatch day approaches
Movement is reassuring when you see it, but its absence during one short check absolutely does not prove the embryo has died. The chick might be perfectly alive and resting, facing away from the light, or tucked into an angle the beam cannot read clearly.
Infertile Egg Candling: What It Looks Like
An infertile egg usually stays much clearer than a developing egg. You may still see the yolk as a faint shadow, but you will not see the branching network of blood vessels or the growing dark embryo that appears during normal development. Mississippi State Extension describes an infertile egg as clear apart from a slight yolk shadow, while a live embryo develops visible blood vessels around it (2).
The difficult part is separating a truly infertile egg from one that is simply too early to read. Early embryo death can create another confusing picture because development may have started before stopping. Timing and change between checks are what help separate the three.
| Possible situation | What you may see | What separates it | What to do |
|---|---|---|---|
| Too early to tell | Mostly clear interior, yolk shadow, little or no visible vessel development | Common during the first few days, especially with dark or heavily speckled shells | Return the egg and check again around days 5 to 7 |
| Likely infertile | Egg remains mostly clear with a visible yolk shadow but no branching blood vessels or growing embryo | The appearance stays essentially unchanged after development should normally be visible | Compare it with developing eggs from the same batch and recheck if you are uncertain |
| Possible early embryo death | Blood ring, disrupted vessels, or a dark spot that does not continue growing | Signs of development were present, but healthy vessel growth has stopped or broken down | Compare with the previous check and confirm again if the view is unclear |
A clear-looking egg on day 3 tells you very little. By around day 7, the comparison becomes more useful because normally developing eggs should be showing clearer vessel growth. Dark shells can still delay what you are able to see, so an uncertain result should be treated as uncertain rather than automatically infertile.
When the shell is intact and there is no odor or leakage, marking the egg and giving it a short recheck window is usually more useful than making the decision from one difficult view.
Dead Egg Candling: Blood Rings and Stopped Development
A blood ring is a distinct, circular line that can form after an embryo dies and its blood vessels begin to break down. You might also see disrupted vessels, streaking, or a dark mass that simply does not grow between checks (2).
- A blood ring without healthy branching vessels
- Vessels that appear broken or collapsed
- No visible progress between planned checks
- A dark embryo that remains the same size
- Leakage, odor or shell damage
Dead Egg Candling on Day 21
Day 21 creates the most uncertainty because a late-stage chicken egg is already extremely dark. You might see very little movement even when the chick is perfectly alive, resting, or preparing to hatch. Some chicks also arrive a bit later when incubation conditions have slowed development (3).
Do not use a brief lack of movement as your only reason to remove a day-21 egg. Check the timeline. See whether other eggs have started pipping, and ask yourself whether the incubator held stable conditions. Avoid opening the incubator repeatedly during lockdown because losing humidity now can make hatching so much harder (4).
If an egg has pipped and you are worried about the chick, review when to help a chick hatch before attempting an assist.
What Egg Candling Can and Cannot Tell You
Candling can clearly show blood vessels, movement, air cell size, cracks, and broad changes in development. It helps you spot a clear egg, a probable blood ring, or a batch that is developing unevenly.
But it cannot always tell you why development stopped. It also cannot magically turn a nearly black, late-stage egg into a clear answer.
- The exact cause of embryo death
- Whether every motionless late-stage embryo has died
- Whether every clear-looking dark egg is infertile
- Whether a chick will hatch without difficulty
- Whether humidity is correct based on one egg alone
Good hatch records, stable temperature and humidity, and comparisons across several eggs from the same batch provide the context that one single candling image cannot.
What the Air Cell Can Tell You
The air cell sits right at the large end of the egg. It normally grows during incubation as moisture slowly leaves through the shell. Mississippi State Extension recommends checking air cell development around days 7, 14, and 18 as one way to judge whether moisture loss is progressing as you expect (3).

| Air cell pattern | Possible interpretation | What to check |
|---|---|---|
| Smaller than expected | Moisture loss may be too slow | Humidity, ventilation and several eggs from the batch |
| Larger than expected | Moisture loss may be too fast | Humidity, room conditions and shell porosity |
| Growing gradually | Moisture loss appears to be progressing | Continue monitoring |
| Irregular or moving | The air cell may have been disturbed | Shipping history, position and careful handling |
Do not change the incubator after looking at one unusual egg. Compare several eggs from the same batch, then check your instruments. Our guide to temperature and humidity for hatching chicken eggs explains how those settings affect the wider hatch.
Candling Quail, Duck, Turkey and Goose Eggs
The basic method stays the same, but the useful checkpoints change with the species. The table below gives you a practical schedule for an early development check, a mid-incubation comparison, and a final check before turning stops or lockdown begins. These are useful checkpoints rather than rigid deadlines because shell color, egg size, and individual development still affect what you can see.
| Species | First check | Mid check | Final check | Typical hatch | What to keep in mind |
|---|---|---|---|---|---|
| Chicken | Day 7 | Day 14 | Day 18 | About day 21 | Usually the easiest reference point for candling. Dark brown or speckled shells may hide early detail. |
| Coturnix quail | Days 5-7 | About day 10 | About day 14 | About day 17 | The eggs are small, so a narrow, focused beam is easier to work with. Development moves quickly compared with chicken eggs. |
| Duck | About day 7 | About day 14 | About day 25 | About day 28 | The larger egg can benefit from a stronger light. Shell color and thickness can make early details harder to read. |
| Turkey | Days 7-8 | About day 14 | About day 25 | About day 28 | Expect the embryo to occupy much more of the egg as the hatch approaches, leaving less detail visible late in incubation. |
| Goose | Days 7-10 | Days 14-18 | About day 25 | About days 28-34 | Large eggs and thicker shells can make early development harder to read. Compare changes across planned checks rather than relying on one view. |
Mississippi State Extension lists an incubation period of about 21 days for chicken eggs, 17 days for Coturnix quail, 28 days for turkey and common duck eggs, and roughly 28 to 34 days for goose eggs. The recommended stop-turning date also changes by species, which is why the final candling check should follow that bird's incubation calendar rather than automatically copying chicken day 18 (3) (4).
Common Egg Candling Mistakes
- Candling too early. A day-2 or day-3 egg often tells you next to nothing useful.
- Checking every day. More handling does not guarantee better information.
- Removing an uncertain egg after one view. Always compare changes unless you have obvious spoilage signs.
- Holding eggs out while you photograph each one. Set up your camera, your light, and your labels first.
- Shaking or spinning the egg. Gentle tilting is plenty.
- Reading a dark shell as a dead embryo. Sometimes the shell is what is blocking the view, not the embryo.
- Ignoring the air cell. It is incredibly helpful when you are reviewing moisture loss across a whole batch.
Last Words
Candling works best when you treat it as a comparison, not a verdict based on one quick look. Keep each check brief, mark anything uncertain, and pay attention to what has changed since the last time you looked. A clear egg early in incubation may simply need more time, while a dark late-stage egg may tell you very little because the chick now fills most of the available space.
The hatch timeline, air cell development, incubator conditions, and the progress of the rest of the batch all matter. And when the evidence is unclear, putting the egg back and checking again is usually wiser than removing it too soon.
If you are still planning your setup, start with choosing the right egg incubator and confirm how long your eggs should take to hatch before building your candling schedule. A good routine does not require constant checking. It gives you a few useful checkpoints, better records, and enough patience to let the eggs tell their own story.
References
- Illinois Extension. “Incubation and Embryology Q & A.”
https://extension.illinois.edu/incubation-and-embryology-q - Mississippi State University Extension Service. “Testing Incubated Eggs for Embryo Development.”
https://extension.msstate.edu/agriculture/livestock/poultry/testing-incubated-eggs-for-embryo-development - Mississippi State University Extension Service. “The Avian Embryo.”
https://extension.msstate.edu/publications/the-avian-embryo - Mississippi State University Extension Service. “Important Incubation Factors.”
https://extension.msstate.edu/agriculture/livestock/poultry/important-incubation-factors
Written by:
Elif Oztuna
Organic Growth SEO & Content Marketing ManagerElif writes about egg incubation, brooding, poultry care, and poultry equipment, with a focus on the questions that come up when you're actually trying to hatch eggs or care for a growing flock. Her background in advertising and psychology shapes the way she approaches those questions: understand the problem first, then make the answer as useful and clear as possible.