Table of Contents
- Choosing the Right Foundation: Sectional vs. Layer Systems
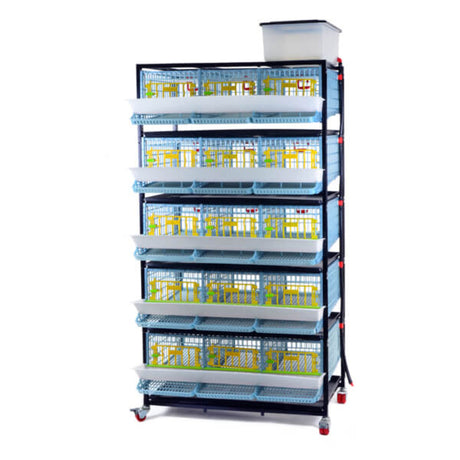
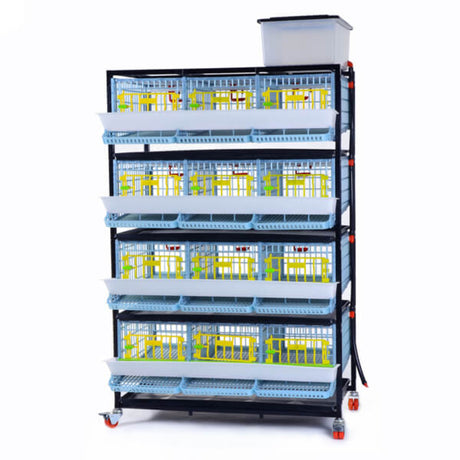
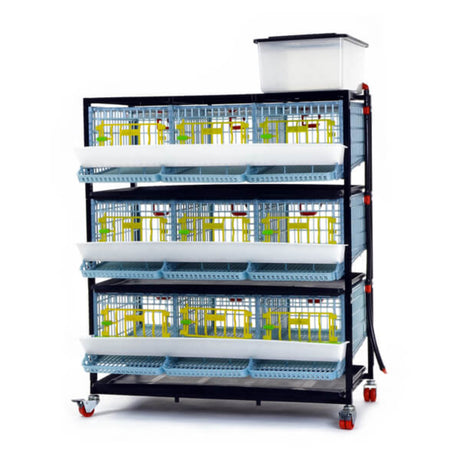
- Structural Overview and Dimensions
- Step-by-Step Quail Cage Assembly Walkthrough
- Step 1: Setting up the Base and Support Frame
- Step 2: Installing the Floor Grid and Slanted Mesh Panels
- Step 3: Erecting the Side, Back, and Divider Walls
- Step 4: Securing the Top Ceiling Panel and Front Access Doors
- Integrating the Automatic Watering and Feeding Systems
- Assembling the PVC Nipple Drinkers
- Mounting the External Feed Troughs
- Real-World Tips, Tradeoffs, or Common Mistakes
- Quick Decision Checklist
- Summary
Mastering Your Quail Cage Assembly: A Step-by-Step Guide to Efficient Setup
Are you setting up a modern, high-capacity quail cage for the first time?
A commercial-grade quail layer or breeder cage can look confusing at first, especially when you have panels, trays, doors, feeders, and automatic watering parts laid out in front of you. This guide will walk through a quail cage setup for backyard homesteaders, urban farmers, and breeders who want a cleaner, more organized quail housing system.
With this hands-on breakdown, you will bypass common assembly mistakes, optimize your workflow, and ensure your birds have a secure, functional environment right from day one. Here is my assembly video for the 5-layer quail cage setup:
Choosing the Right Foundation: Sectional vs. Layer Systems
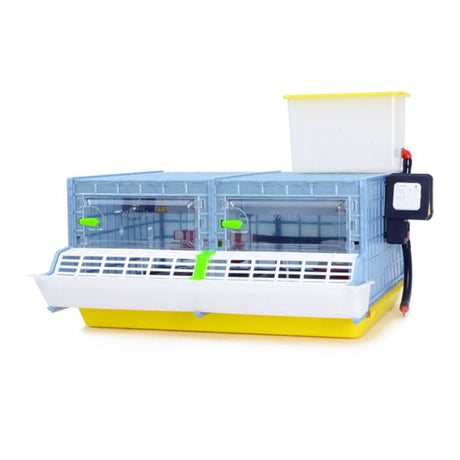
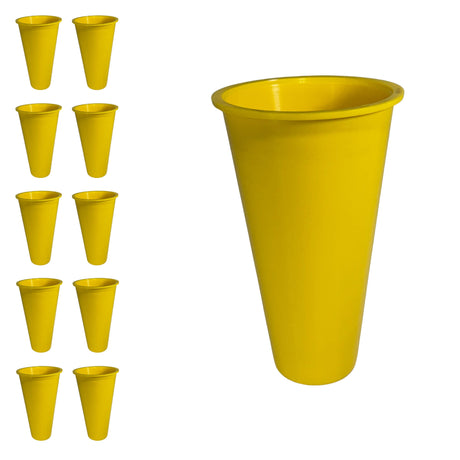
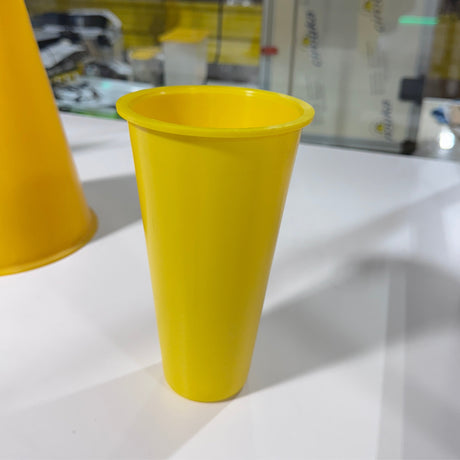
I think before diving into the assembly, it helps to understand how a multi-tier quail hutch works. Modern systems use slanted floors for automatic egg collection, removable manure trays for easier cleaning, and integrated PVC troughs to minimize feed waste. These features dramatically improve biosecurity and reduce daily flock maintenance time compared to traditional deep-litter setups.
Structural Overview and Dimensions
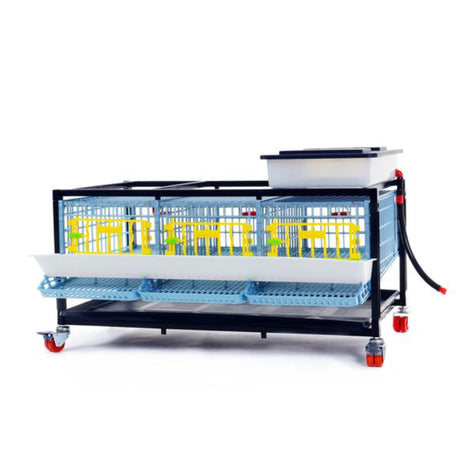
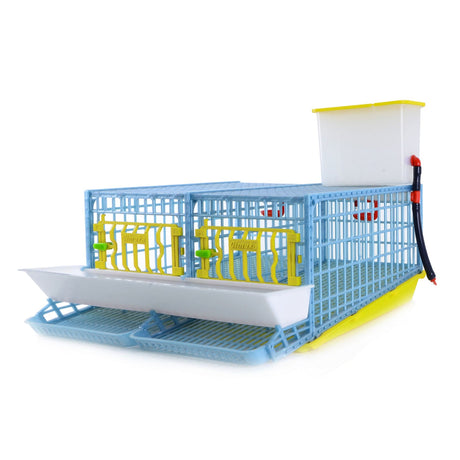
In my experience, most of the high-quality professional quail cages are usually manufactured using durable, UV-resistant plastics to counter the highly corrosive nature of quail manure. A standard multi-tier footprint maximizes vertical real estate and allows you to humanely house dozens of birds in a compact space while maintaining optimal airflow and ventilation requirements.
Step-by-Step Quail Cage Assembly Walkthrough
Assembling a multi-tier cage is much easier when you work from the bottom up. Before you begin, sort the panels, trays, doors, feeders, water lines, clips, and frame parts so you are not stopping every few minutes to look for the next piece.
Step 1: Setting up the Base and Support Frame
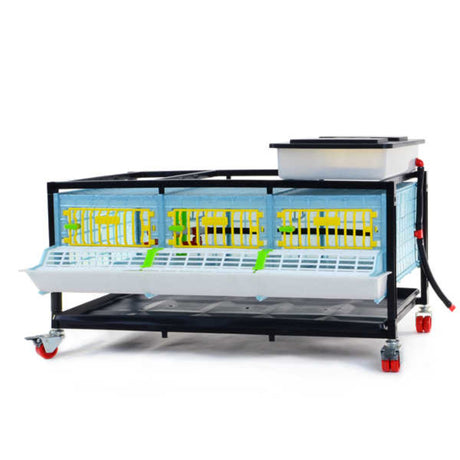
Begin by assembling the heavy-duty structural frame or stand. Connect the vertical legs to the horizontal bracing bars using the provided hardware. Don’t forget to make sure all joints are completely flush and firmly tightened. If your unit includes heavy-duty caster wheels, install them directly onto the bottom of the frame at this stage so the cage can be moved for cleaning and maintenance.
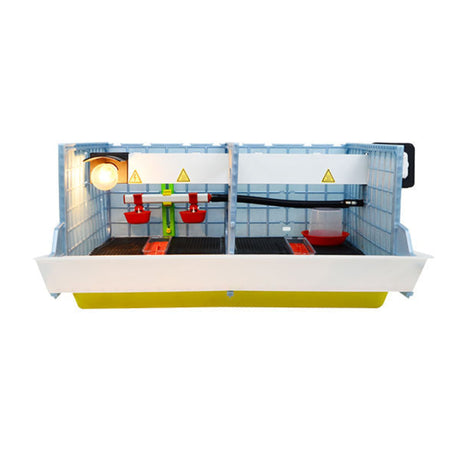
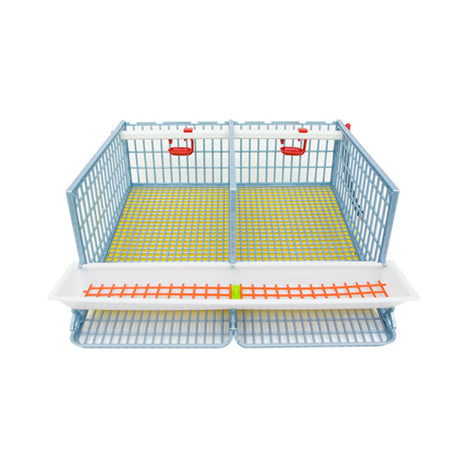
Step 2: Installing the Floor Grid and Slanted Mesh Panels
Position the lower floor mesh across the frame supports. At this stage of the setup, you have to pay close attention to the direction of the slope because the floor must slope gently toward the front of the cage. This subtle angle enables freshly laid eggs to safely roll forward into the external catch tray, preventing the birds from stepping on or cracking them. Then, secure the grid panels firmly using the parts provided by the company.
Step 3: Erecting the Side, Back, and Divider Walls
Align the side and rear mesh panels with the floor base and attach the internal divider walls to create distinct sections. These dividers are extra important for managing breeding ratios, separating groups, and reducing aggressive behavior within the flock.
Step 4: Securing the Top Ceiling Panel and Front Access Doors
Place the ceiling mesh over the assembled walls and clip it tightly into place. Then, carefully hang the front cage doors while making sure the built-in spring locks move smoothly and click shut completely. Active quails are notorious escape artists that can easily exploit loose doors or weak gaps, so reliable door latches are vital for your setup.

Integrating the Automatic Watering and Feeding Systems
A good quail coop setup should make feeding and watering easier, not more complicated. The automatic watering and external feeding parts are what make this type of quail housing more practical for daily use.
Assembling the PVC Nipple Drinkers
Start by running the automatic watering line along the back or top of each cage tier. Thread the spring-loaded nipple drinkers directly into the pre-drilled holes on the PVC square pipes and check if each connection includes a rubber gasket to prevent slow water leaks. Then connect the tier lines together using flexible tubing and attach them securely to a central water reservoir or low-pressure float valve system.
Mounting the External Feed Troughs
Hang the wide external plastic feed troughs onto the brackets located on the front of the cage. Have a careful look; the troughs should sit low enough for the birds to easily extend their heads through the front spacing to feed, but high enough to prevent them from kicking feed out or contaminating the trough with manure.

Real-World Tips, Tradeoffs, or Common Mistakes
From my hands-on experience in assembling and operating poultry equipment, I want to share some practical observations that can make or break your setup:
- The Overtightening Trap: Avoid cranking down bolts or plastic clips with your full force immediately. Keep your structural hardware slightly loose until the entire multi-tier frame is fully squared up, then systematically tighten every fastener. By doing this, you will prevent warped panels and misaligned doors.
- Water Pressure Management: Automatic poultry nipple drinkers usually need low-pressure, gravity-fed lines. Connecting them directly to a standard high-pressure garden hose or municipal water line will instantly rupture the internal seals and flood your cage trays. So always use a dedicated gravity bucket or a specialized pressure regulator.
- Manure Tray Maintenance: While removable droppings trays are incredibly convenient, neglecting them leads to rapid ammonia buildup. In my experience, dusting the clean trays with a thin layer of agricultural lime or pine shavings before sliding them under the cages makes it easier to neutralize odors and scrape off old manure.
Quick Decision Checklist
To help you decide if this type of housing matches your homesteading or production goals, review my quick decision checklist:
| Feature / Requirement | Multi-Tier Cage System | Traditional Deep-Litter Aviary |
|---|---|---|
| Space Efficiency | Excellent (High vertical bird density per sq ft) | Poor (Requires extensive floor footprint) |
| Egg Cleanliness | Superior (Rolls out immediately away from birds) | Moderate to Poor (Requires frequent manual collection) |
| Initial Setup Time | Moderate (Requires structured panel assembly) | Low to Moderate (Basic enclosure build) |
| Flock Sanitation | High (Zero contact with accumulated droppings) | Moderate (Requires intensive bedding management) |
Summary
The life quality of your quails after they leave their brooder depends on your housing setup, so investing the time to correctly assemble a structured multi-tier quail cage lays the foundation for a highly profitable and healthy flock. In my opinion, this specific setup is absolutely ideal for urban homesteaders, commercial egg producers, and breeders looking to optimize limited space while maintaining pristine biosecurity standards. However, if your long-term goal is to raise heritage quail breeds in a purely natural, free-range setting with flight training, a spacious ground-based aviary or flight pen may suit your philosophy better.
Written by:

Christian