
Table of Contents
- Before You Compare Incubators, Describe the Hatch
- What Is the Best Incubator for Chicken Eggs?
- Capacity: The Number Changes With the Egg
- Tabletop or Cabinet? Think About the Next Six Months
- What Makes the Best Egg Incubator for Beginners?
- What Does Automatic Actually Cover?
- Setter, Hatcher or a Combined Machine?
- Which Hatching Time Incubator Series Fits?
- Check the Room, Cleaning and Parts
- Try to Break Your Decision Before Checkout
Starting an incubator search by looking at capacity numbers seems logical. But that logic falls apart quickly. A machine advertising a 60-egg capacity usually means chicken eggs. Sometimes the tray included in the box is entirely wrong for your needs. Or worse, you find yourself with one group of eggs ready to hatch while another group in the exact same machine still requires turning.
Product titles also fail to answer a much more practical question. What exactly will an ordinary Tuesday look like while this machine is running? You might just be setting twelve chicken eggs for a single spring hatch, and you happen to be home often enough to monitor the equipment. On the other hand, you might be gathering quail eggs daily and filling a new tray every week. You might already realize that one small incubator is going to multiply into three by the end of the season. Two buyers with those routines can look at the exact same model and arrive at completely opposite conclusions.
If we rank these decisions logically, the specific bird comes first, followed by the number of eggs going into the machine together and how many batches you actually expect to run. Features and price only matter after you know what your setup requires.
Quick answer: A small chicken hatch does well with a forced-air tabletop model. Look for automatic turning, clearly visible temperature and humidity readings, and removable parts. That calculation changes once a standard batch hits 60 chicken eggs or hatching becomes a regular weekly chore. At that stage, look closer at a cabinet incubator. Anyone setting eggs on varying dates also needs to plan the hatching stage itself. Using a separate setter and hatcher often solves scheduling conflicts that raw capacity cannot fix.
If you already have your species, batch size, and schedule figured out, you can compare the full egg incubator and hatcher range. Keep reading if any of your answers still include the word "probably."
Before You Compare Incubators, Describe the Hatch
Picture your eggs sitting on the counter, ready to go right now today. We are not talking about some future point after your flock expands. How many eggs are sitting there? Did they all come from the same flock at roughly the same time? When the machine inevitably beeps for water or triggers an alarm, who is actually around to hear it?
Asking yourself these things is far more useful than opening six different product tabs and trying to recall which plastic box featured the nicest control panel. Take a moment to write down rough answers to the following questions.
- Which bird are you hatching?
- How many eggs will normally go in on the same day?
- Are you running one or two seasonal hatches, monthly batches, or a continuous schedule?
- Do you expect every egg in the machine to share a hatch date?
- How much physical room can the incubator occupy?
- Which daily checks easily fit your routine, and which repetitive jobs simply must be automated?
Try to avoid inflating your answers just to justify buying a massive machine. A giant cabinet purchased for an imaginary future flock will consume a ridiculous amount of floor space between its two annual hatches. You should be equally critical of a plan that only considers your very first dozen eggs. Poultry projects have a habit of expanding rapidly after that first successful run.
Running a tiny model once in April is a very minor commitment. But if you run that exact same machine back to back for three straight months, the limitations become incredibly obvious. You will find yourself constantly cleaning and resetting it, waiting around for space to open up, and probably turning away eggs that fail to fit your tight schedule. This is precisely why two incubators with crystal clear specifications can still result in a highly confusing purchasing decision.
Try keeping your timeframe modest. You do not need to map out the next ten years. Looking at the next six months is usually plenty of time to figure out if you are just planning a single hatch or establishing a serious routine.
What Is the Best Incubator for Chicken Eggs?
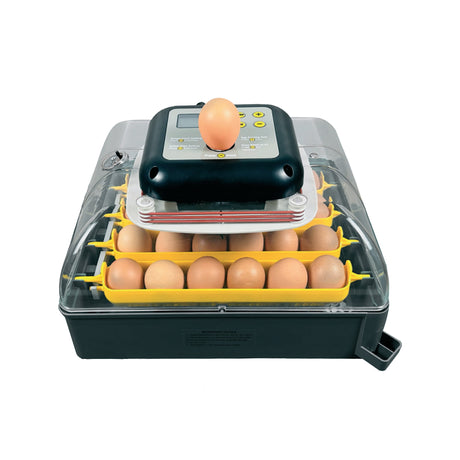
If you are a first-time keeper dealing with a small batch, a forced-air tabletop model is usually the best incubator for chicken eggs. You want an automatic turner, a display that is readable without opening the machine, and parts you can easily remove once the hatch concludes.
That specific advice is far less dramatic than a flashy list of ten product winners, but it is much more useful. Beginners need to learn what normal operation actually looks like first. A batch of twenty-four eggs is perfectly adequate to make the hatch meaningful. You do not want to be managing a large cabinet when every single sound, humidity reading, and minor temperature shift is still totally unfamiliar.
Hatching Time's tabletop incubators hold up to 24 chicken eggs. For an occasional run, that capacity might be everything you need. Having a clear lid also satisfies the entirely normal urge to stare at the eggs without ruining the internal climate by opening the incubator every fifteen minutes.
That entire calculation shifts the moment 60 chicken eggs becomes a standard batch rather than an ambitious goal. At that scale, running multiple tabletop machines means managing multiple lids, displays, water systems, and sets of notes. It gets chaotic quickly. A cabinet brings all those trays together into one streamlined system. Just remember that a cabinet also demands more physical room, extra cleaning effort, and a much larger financial investment. Upgrading purely because a large cabinet looks impressive is rarely a smart move.
Regardless of which format you end up choosing, the machine itself does not replace the manufacturer's operating instructions. You always need to follow the manual for the model. You can use our separate guide to temperature and humidity for hatching chicken eggs when you sit down to plan the actual cycle. The goal right now is to help you buy the right kind of equipment, not to duplicate every single setting you will eventually use after the box arrives.
Capacity: The Number Changes With the Egg
Asking how many eggs a machine holds sounds like a completely straightforward question. It almost never has one simple answer.
Manufacturers typically use standard chicken eggs as their baseline reference capacity. Quail eggs are significantly smaller. Duck eggs require much more room, and goose eggs can easily make a cabinet that looked enormous in the product photos feel surprisingly cramped. None of this points to a flaw in the machine itself. The physical egg simply changed.
Then you have to factor in the tray. Small eggs have to sit securely in order to be turned correctly. Large eggs require adequate spacing. An incubator can literally have plenty of empty internal volume and still be completely unusable for your batch if the supplied tray fails to fit your specific eggs. Tray photos are absolutely not the exciting part of an incubator listing, but you need to look at them anyway.
Cornell's guidance for duck eggs specifically notes both their larger egg size and their longer incubation period when compared to chicken eggs.(2) That second detail is critical. Capacity only dictates what physically fits inside the box. Your incubation calendar determines whether those eggs can actually share the machine sensibly.
Start your search by looking at the collection for your bird, and then compare the models that remain:
You are going to notice some machines popping up in more than one collection. That is entirely expected. A good incubator can often handle several different poultry species, provided it is fitted with the correct tray and run with the appropriate settings. However, that does not mean you should throw every species inside the machine together.
Texas A&M AgriLife Extension strongly advises against mixing species with different incubation periods if one machine is also going to be used for hatching.(1) Think about setting a mixed batch of chicken and duck eggs on the exact same day. The chicken eggs will eventually approach their hatch date while the duck eggs still have several days left in their cycle. The eggs fit perfectly fine, but the schedule absolutely does not.
Before you place any order, you need to track down three highly specific numbers for your bird:
- The setter capacity
- The hatching capacity
- The capacity of the tray that is actually included
If a product page just slaps one giant number on the screen and you cannot figure out which tray or stage it describes, contact them and ask before you spend your money. A fancy cabinet name is a terrible substitute for an accurate capacity chart.

The incubator stays the same. Egg size and tray design determine how many eggs it can hold.
Tabletop or Cabinet? Think About the Next Six Months
The first extra tabletop incubator can feel like flexibility. The third may feel like a part-time administrative job.
You can absolutely run more than one small machine. Some poultry keepers prefer separate incubators for different species or hatch dates. But each machine has its own water, readings, cleaning, alarms, and notes. A cabinet starts to earn its footprint when bringing those repeated tasks into one system makes the week calmer.
Look at your likely routine for the next six months:
| Format | It Often Fits | What Becomes Simpler | What Comes With It |
|---|---|---|---|
| Tabletop | A first hatch, a classroom project, a small flock, or occasional batches | Finding a place for the machine and learning with a manageable number of eggs | Limited room if the flock or hatch frequency grows |
| Cabinet | Larger batches, regular hatches, established breeders, and small farms | Managing several trays and repeated cycles inside one machine | Floor space, installation planning, a larger cleaning job, and a higher purchase price |
| Separate setter and hatcher | Eggs set every week, staggered groups, or a continuous breeding schedule | Giving eggs near hatch their own space while younger eggs continue turning | A transfer step and a second machine to clean, check, and maintain |
| Trolley system | High-volume and professional production | Moving and organizing large egg loads as part of a planned cycle | Delivery access, suitable utilities, operating room, and a defined workflow |
A tabletop unit makes sense when you want to understand one small hatch from start to finish. You can see the eggs, learn the controls, and clean a compact machine afterward. There is no prize for starting with a cabinet.
On the other hand, do the arithmetic before buying several small units. Three tabletop incubators may give you useful separation between batches, but they also give you three opportunities to forget which water reservoir you checked that morning.
The best egg incubator is the one that leaves you with a routine you can repeat. Capacity matters. The number of separate tasks created by that capacity matters too.

A tabletop model keeps a first hatch visible and manageable without asking the room to become a hatchery.
What Makes the Best Egg Incubator for Beginners?
The best egg incubator for beginners removes repetitive work but does not hide what the machine is doing.
Beginners often focus on the number of automatic functions. I would also look at how quickly you can understand the display, refill the water, inspect the eggs, and take the machine apart. Those ordinary interactions shape the hatch far more than the impressive word printed in the largest type.
These details tend to become important after the eggs are already inside:
- Forced-air circulation: A fan helps reduce the temperature differences associated with a still-air design.
- A turner made for the egg: Confirm the species, the tray, and how the turning function stops or is removed before hatch.
- Readings you can see at a glance: Opening the lid should not be necessary every time you want to check temperature or humidity.
- Sensible water access: Find out where the water goes and whether a routine refill requires opening the chamber.
- A clear view inside: You are going to look. A window or clear lid lets you do that without disturbing the conditions.
- Removable parts: Trays, baskets, and water components need a proper cleaning after hatch day, not a polite wipe around the edges.
- Instructions you can follow: Nobody is excited to read an incubator manual before setting eggs. Read it anyway. Live eggs should not become the practice run.
A complicated control panel does not automatically make the incubator more capable. Sometimes it simply gives a new owner more places to wonder whether they pressed the wrong button.
Even a highly automated model still needs a person to check the display, water supply, room conditions, turner, and alarms. University of Maryland Extension recommends following the manufacturer's instructions for egg placement and ventilation when an automatic turner is used.(3) Automation can move the tray. It cannot notice that the wrong one was installed.
Before setting valuable eggs, run the machine empty and watch how it behaves in the room where you intend to use it. Our egg incubator setup video guide gives you a practical sequence to follow. Once the eggs are in, use the separate guide on how often to turn eggs in an incubator for the operating routine.
What Does Automatic Actually Cover?
Put three incubator descriptions next to each other and the same words begin to blur: digital, automatic, smart, precise. They sound reassuring. They are also incomplete until you know which job each word describes.
Take “automatic,” for example. The machine may turn the eggs automatically while humidity remains entirely manual. Another model may regulate humidity from a water supply but still expect you to stop the turner at the correct time. A third may add alarms or remote monitoring. The label stays the same while your daily workload changes.
If you want a machine that handles more of those tasks, compare the stated functions in the automatic egg incubator collection. Then translate each feature into a plain question.
Does it turn the correct tray?
Automatic turning is useful because it removes a repetitive job from the day. But the turner still has to suit your eggs, operate as the manual describes, and stop or come out before hatch. This buying guide only needs you to confirm those points. The timing and handling instructions belong in the turning guide linked above.
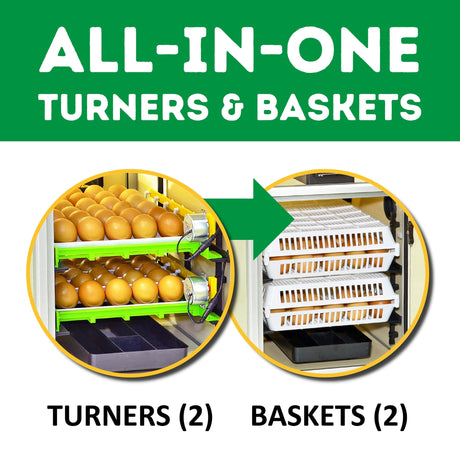
Check what arrives in the box. Product images sometimes show several tray options even though the model includes one. If you hatch quail now and expect chickens later, find out whether the alternative tray is available and how changing it affects capacity.
What does the display measure, and what does the machine control?
A temperature reading, temperature control, and a high or low alarm are three related functions. They are not three names for the same function. The display tells you what the sensor sees. The control system works to hold the setting. The alarm tries to get your attention when the reading moves beyond a limit.
Humidity works the same way. A percentage on the screen does not prove that the machine adds water or adjusts moisture by itself. With a manual system, that part remains your job. An automatic humidity system needs a water source and its own components, all of which eventually need to be checked and cleaned.
And yes, this is a little tedious to compare. It is much less tedious than discovering the difference halfway through a hatch.
Can you understand the alarm when it sounds?
An alarm is useful when it tells you what changed and what to inspect. Check whether the manual explains the alert codes, whether the limits are adjustable, and what happens after a power interruption. A bright warning with no clear next step can create more panic than information.
For a cabinet, look beyond the number nearest the door. Air needs to move through a much larger chamber and around several trays. Check the model's airflow design, sensor position, calibration instructions, and any guidance for independent verification. One steady display cannot tell you how carefully a cabinet was placed or whether a vent has been blocked by the shelf beside it.
The least glamorous questions are often the most useful: Where does the water enter? Which pieces come out? Can you reach them with your hand? Will the door open fully in the chosen spot? Those answers are rarely summarized by the word “smart.”
Setter, Hatcher or a Combined Machine?
The terminology sounds technical, but the problem is basically a calendar problem.
A setter holds the eggs while they are being incubated and turned. A hatcher is used for the final stage, after turning stops and the eggs are prepared to hatch.
Suppose you set one group of chicken eggs and wait until that entire hatch is complete before starting again. A combined setter-hatcher can handle both stages. You follow the model instructions, stop or remove the turning system at the correct point, and prepare the hatching area.
Now suppose you set a new tray every Monday. When the oldest eggs enter the hatch stage, the group placed one week later still needs its regular incubation routine. The following group does too. One cabinet is suddenly being asked to keep turning some eggs while giving another group a separate hatch environment.
This is where a hatcher-only incubator becomes useful. It gives the oldest group its own space, contains the shell fragments and down from hatch day, and leaves the setter available for younger eggs.
You do not need two machines to prove that you are a serious poultry keeper. You need them when the schedule makes one machine awkward. Someone hatching twice a year may never face that problem. Someone filling a tray every week probably will.
If your batches overlap, compare incubator and hatcher kits with capacities that suit the number of eggs transferred during each hatch window. The setter may hold several groups at once. The hatcher only needs space for the group moving out that week. You can see the transfer process in our guide to when to move eggs to a hatcher or hatching basket.

A combined machine works well for one batch at a time. Separate equipment helps when hatch stages overlap.
Which Hatching Time Incubator Series Fits?
A series name can point you toward the right part of the range. It cannot choose the exact configuration for you.
Use the table as a first filter. On the model page, confirm the species capacity, supplied trays, setter or hatcher function, included humidity equipment, and room requirements. Two cabinets that look almost identical from the outside may be sold for different jobs.
| Starting Point | A Likely Plan | Why It May Fit | Check Before Ordering |
|---|---|---|---|
| Tabletop incubators | A first hatch or up to 24 chicken eggs | The batch is small, occasional, and needs a compact automatic setup | Capacity and supplied tray for your species |
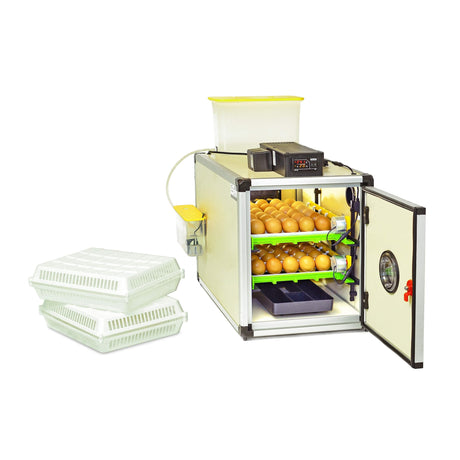
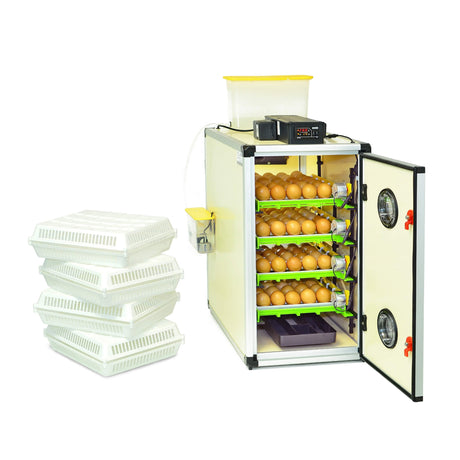
| CT incubators | Regular cabinet hatches in the 60, 120, or 180 chicken-egg classes | One small machine no longer suits the normal batch or frequency | Setter-hatcher, hatcher-only, or kit configuration and the included trays |
| HB incubators | Larger cabinet batches in the 175 to 700 chicken-egg classes | An established breeding plan needs more capacity across repeated cycles | Setter, hatcher, or combined model plus room, power, and water needs |
| T Series incubators | High-volume trolley hatching | Egg loads and production cycles have reached professional scale | Exact trolley and tray setup, delivery access, space, utilities, and lead time |
| Setter-hatcher kits | Frequent or staggered batches | The setting and hatching stages now overlap | Weekly egg volume, transfer timing, and matched setter-to-hatcher capacity |
The jump from CT to HB or T should come from the volume and workflow, not from the feeling that a larger series must be better. A CT cabinet working comfortably within its normal cycle is a better purchase than a much larger machine spending most of the year nearly empty.

Compare the exact CT, HB, or T configuration. The series name does not tell you which trays and hatch functions are included.
Check the Room, Cleaning and Parts
It is easy to compare two incubators as if they will operate in a blank, climate-controlled room. Then the chosen machine arrives and sits beside a sunny window, under an air vent, or so close to a shelf that the door cannot open completely.
Extension guidance recommends keeping incubators away from direct sunlight and temperature changes, then running the machine before eggs are set.(1)(3) For a tabletop model, this may be as simple as finding a stable indoor surface away from drafts and curious pets. A cabinet needs more thought.
Measure the cabinet, of course. Then measure the space required to open the door, access the back or side, refill the water supply, and keep the vents clear. Check the power requirements. If the humidity system uses a tank or water connection, decide where that will go too.
A cabinet squeezed perfectly between two shelving units is only perfect until a hose needs attention.

Leave room for airflow, water access, the open door, and the person who has to clean the cabinet.
Cleaning deserves the same attention. A newly hatched chick is charming. The mixture of shell, down, moisture, and residue left around the basket is considerably less charming.
Texas A&M AgriLife Extension recommends cleaning and disinfecting incubation equipment after each hatch, and UF/IFAS advises following the manufacturer's cleaning specifications.(1)(4) Before you buy, look at how the trays, hatch baskets, water channels, and other removable pieces come apart. Imagine cleaning the corners rather than admiring the empty cabinet.
Also ask what happens after a few seasons. Can you source a replacement sensor, fan, heating component, water tank, or extra tray? Are the manuals available? Is there support when an alarm code makes no sense on a Sunday morning? The incubator parts and accessories collection lets you check the wider system instead of treating the cabinet as one sealed purchase.
This is one area where the cheapest initial price can become misleading. Add the tray that was not included, the humidity component you assumed was standard, and the replacement part that is difficult to source. Compare the machine you can actually operate, not the photograph of an empty cabinet.
Try to Break Your Decision Before Checkout
Once one model looks like the winner, stop looking for reasons to love it. Spend ten minutes trying to make it fail your plan.
Put the capacity chart beside your real eggs. Walk to the place where the incubator will sit. Look at next month's calendar. If the decision still works after that, you probably understand what you are buying.
These are the questions I would want answered without guessing:
- Which species and egg sizes will I hatch?
- What is my usual batch, rather than the largest batch I can imagine?
- Which tray comes with the incubator?
- What are the setter and hatcher capacities for my eggs?
- How often will a new group go in?
- Will all the eggs share a hatch date?
- Which jobs does the machine automate, exactly?
- How does the turning system stop or come out before hatch?
- Where does the water come from, and how is it refilled?
- Can I remove and clean the trays, baskets, and water components?
- Does the room provide stable conditions, ventilation, working clearance, power, and water access?
- Are manuals, support, replacement parts, and alternative trays available?
Watch for the common shortcuts while you answer. Do not use a chicken-egg capacity for duck or goose eggs. Do not read “automatic” as permission to forget the machine. Do not compare two cabinets without checking what each one includes. And please do not leave the hatching stage for future you to solve after eggs with different dates are already inside.
For a small first chicken hatch, the answer may be a tabletop incubator that you can understand, observe, and clean without turning the week upside down. A breeder filling trays every Monday is solving a different problem and may need a cabinet setter beside a separate hatcher. Neither buyer benefits from the other's machine.
Choose the eggs. Sketch the schedule. Decide which work you want the incubator to handle. Then compare the complete Hatching Time incubator range with those answers in front of you. That is far more reliable than letting the largest capacity number choose for you.
References
- Texas A&M AgriLife Extension, Incubating and Hatching Eggs. - https://aggie-horticulture.tamu.edu/wp-content/uploads/sites/12/2011/02/Lee-Cartwright-Incubating-and-hatching-eggs.pdf
- Cornell University College of Veterinary Medicine, Hatching Duck Eggs. - https://www.vet.cornell.edu/animal-health-diagnostic-center/programs/duck-research-laboratory/hatching-duck-eggs
- University of Maryland Extension, Hatching Eggs at Home. - https://extension.umd.edu/resource/hatching-eggs-home-fs-1114
- UF/IFAS Extension, Getting Started in the 4-H Embryology Project. - https://ask.ifas.ufl.edu/publication/4H367
Written by:

Elif Oztuna
Organic Growth SEO & Content Marketing ManagerElif writes about egg incubation, brooding, poultry care, and poultry equipment, with a focus on the questions that come up when you're actually trying to hatch eggs or care for a growing flock. Her background in advertising and psychology shapes the way she approaches those questions: understand the problem first, then make the answer as useful and clear as possible.