
Table of Contents
One of the more annoying things about incubator humidity is that the amount of water you add and the number on the display don't always seem to have much to do with each other.
You can top up the reservoir in the morning and spend the afternoon watching a reading that refuses to rise. Another day, with exactly the same setup, the humidity may climb on its own. The eggs haven't changed, and neither has your routine. So what's different?
Quite often, the answer has something to do with the exposed water surface, the air moving through the incubator, or even the heating running in the room. And if you're using an incubator with automatic humidity control, there are a few more things to consider.
Before reaching for more water or changing the ventilation, it's worth understanding which of these factors might be responsible.
If you need to raise humidity, start by checking the water supply and how much water is exposed to the air. If you need to lower it, look at the evaporation area, room humidity, and the manufacturer's ventilation instructions. A brief change on the display doesn't necessarily call for an adjustment, especially after opening the incubator or during hatching.
For recommended humidity settings throughout chicken egg incubation, you can refer to our chicken egg incubation temperature and humidity guide. Here, we'll look at what you can do when the humidity refuses to cooperate.
How to Control Humidity in an Incubator
There's quite a difference between an incubator that briefly loses humidity when you open it and one that struggles to maintain humidity throughout the day.
Before changing anything, think about when you first noticed the problem. Perhaps the room has become colder overnight, or the reading started behaving differently after you refilled the water.
Those observations can tell you quite a lot.
For example, a sudden drop immediately after opening the incubator has a fairly obvious explanation. Some of the warm, moist air escapes and is replaced by air from the room. But if the incubator stays closed for several hours and humidity continues falling, you'll want to investigate further.
Here's a useful place to start.
| What you're seeing | What might be happening | Check this first | What to do next |
|---|---|---|---|
| Humidity won't rise, even after refilling | The water surface may be too small, the room may be dry, or the humidity system may need attention | Water level, evaporation area, room humidity | Follow your model's water instructions and see whether the reading improves |
| Humidity falls repeatedly during the day | Water is running low, room conditions have changed, or air is escaping unexpectedly | Water supply, room conditions, lid or door | Check the normal water setup and whether the problem continues with the incubator closed |
| Humidity drops immediately after opening | Warm, moist air has escaped | Whether the reading begins recovering after closing | Allow the incubator to settle before changing anything |
| Humidity stays higher than expected | Too much exposed water, humid room air, or an inaccurate measurement | Water channels and room humidity | Check the manufacturer's recommended adjustment procedure |
| Droplets appear inside the window | Moist air may be condensing on a cooler surface | Room temperature and where the water is collecting | Check for condensation or an actual water leak |
| Humidity climbs as chicks hatch | Moisture released during pipping and hatching | Whether chicks have started emerging | Watch the hatch progress before deciding an adjustment is necessary |
| Two hygrometers disagree | Sensors may be measuring in different conditions | Position, temperature, and stabilization time | Compare both instruments under similar conditions |
| CT incubator displays a humidity alarm | The machine may be unable to maintain its setting | Alarm code, water supply, ambient humidity | Use the relevant Hatching Time troubleshooting instructions |
You don't need a complicated monitoring system to spot a pattern. Write down the time, the humidity reading, and anything you changed.
If the number recovers after every water refill but falls again unusually quickly, that's useful information. So is a reading that changes whenever the incubator room gets warmer.
And if you make several adjustments at once, you'll have no idea which one helped. Try to change only what is necessary, then give the machine time to respond.
How to Increase Humidity in an Incubator
Adding more water seems like the obvious answer when incubator humidity is too low.
Sometimes it works immediately. Other times, you can fill the reservoir completely and watch the display remain exactly where it was.
The explanation often comes down to something that's easy to overlook: how much of that water is actually exposed to the air.
1. Check the Water Surface, Not Only the Water Level
Imagine two shallow dishes sitting in the same warm room. One is narrow and deep, while the other is much wider.
Both contain water, but the wider dish exposes more of it to the surrounding air. Under comparable conditions, that larger surface generally allows more water to evaporate.
The same principle applies to incubators that use water trays or channels.
According to Mississippi State University Extension, increasing the exposed water surface helps maintain higher humidity during incubation. The University of Maine Cooperative Extension also recommends increasing the water-pan area when additional moisture is needed. (1, 2)
So if your incubator's water channel is already full, pouring in more water may accomplish very little.
What matters is whether you're using the correct channel, tray, or evaporation area for your machine.
Some incubators have several water channels for different stages of incubation. Others use an external refill system or an active humidifier. Before introducing another container or changing the setup, check what the manufacturer recommends.
2. Find Out How Dry the Room Is
Your incubator might be doing everything it's supposed to do while working in a room that's unusually dry.
This becomes particularly noticeable during colder months when indoor heating is running regularly.
You may have an incubator that maintained humidity quite comfortably during spring, only to discover that it needs more attention once the heating season begins.
The machine hasn't necessarily changed. The air around it has.
An inexpensive room hygrometer can help you understand what's happening. Measure the humidity in the room separately from the incubator, preferably over several hours rather than relying on one reading.
Also think about where the machine is sitting.
Is it near a heating vent? Does a draft pass over it whenever someone opens the door? Is the room temperature noticeably different between morning and evening?
You don't need to turn your incubation room into a laboratory. But moving the machine away from unstable conditions, preferably between hatches, may remove some of the variation you're trying to correct.
3. Check Whether the Incubator Is Losing Moist Air
A lid that hasn't been seated properly or a door that doesn't close as intended can affect the environment inside. Check that no trays, cables, or other objects are interfering with the normal closure.
But don't confuse an unintended gap with the ventilation your incubator needs. Closing vents may retain moisture, yet developing embryos still require fresh air, especially near hatch. Follow your model's vent instructions rather than blocking openings to force humidity higher. (2)
4. What if the Reservoir Is Full and Humidity Still Won't Rise?
At this point, it's worth checking which type of humidity system you're using.
With a passive water system, investigate the available evaporation surface, the temperature inside the machine, and the humidity in the surrounding room.
With an active humidity system, check whether the water supply and humidity-generating equipment are operating as expected.
There's also the possibility that the displayed reading isn't accurate, particularly if a second instrument consistently disagrees with it.
Before deciding that the incubator has a problem, compare the readings under stable conditions. And if the machine is already holding fertile eggs, avoid experimenting with unapproved water arrangements.
How to Lower Humidity in an Incubator
Let's say you've been having the opposite problem. The humidity reading is already higher than you want it, and taking some water out hasn't made much difference.
You might be tempted to open the incubator for a while and let the moisture escape. The reading will probably change, but there's a good chance it will climb again once you close everything.
If that happens, the water you removed wasn't necessarily the main issue.
1. Look at How Much Water Is Exposed
Remember those two dishes we talked about earlier?
The same explanation applies when you're trying to lower humidity.
In an incubator with passive water channels, reducing the exposed surface may help reduce evaporation. University of Missouri Extension specifically recommends reducing the water-pan surface area when humidity is too high. (3)
But there's a small detail that matters.
If you take half the water out of a wide, shallow tray, you haven't necessarily changed how much water is exposed to the air. The tray might still have almost the same surface area.
And because incubators have different water arrangements, you shouldn't assume that emptying a particular channel is always the right solution.
Check which trays or channels your model uses for the current stage of incubation before changing them.
2. Check What's Happening in the Room
A humid summer afternoon can make things a little more complicated.
You might be using the same incubator, with exactly the same water setup, and still find that the humidity is higher than it was a month ago. Before blaming the machine, check the room. Incoming air already contains moisture, and a humid room can make it harder for the incubator to lose excess moisture.
If the room hygrometer is reading unusually high, improving the surrounding conditions may help more than removing a little extra water.
3. What About Condensation on the Incubator Window?
A little moisture on the window can look rather alarming, especially when you haven't seen it during previous hatches.
But condensation can happen even when the humidity reading isn't unusually high.
Think about what happens to a bathroom mirror after a hot shower. Warm, moisture-containing air reaches the cooler glass, and water droplets begin forming.
Something similar can happen inside an incubator.
Hatching Time's support documentation explains that condensation may develop when the room temperature is lower than the temperature inside certain cabinet incubators. The resulting water can even escape through the back corners. According to Hatching Time, this is an expected part of the design and doesn't cause chick loss. The recommended solution is to increase the room temperature.
There's another possibility worth knowing about if you're using a CT incubator with a Humisonic unit.
Water can enter the incubator when certain Humisonic components aren't positioned correctly. Hatching Time recommends checking two things: the yellow reservoir lid should have its larger hole facing toward the back of the incubator, and the white circular part of the Humisonic unit should face away from the incubator.
If the white circular part faces the funnel opening, water may bubble over and enter the machine.
These are specific checks for that equipment, so refer to the Hatching Time condensation and leaking guide before changing anything.
4. Humidity Is Still High, Even With Very Little Water
At this point, it helps to stop thinking exclusively about the reservoir.
Perhaps the room air is already humid. Perhaps the reading is inaccurate. Or perhaps the machine's humidity system is still responding to its settings.
Automatic incubators don't all manage excess moisture in the same way, either.
Some humidity controllers are designed primarily to add moisture, while other incubators have additional functions that affect humidity. The CT120 SH, for example, includes an Active Periodic Cooling feature that we'll look at below.
So if you're using an automatic incubator, check what its humidity system is actually designed to do before assuming every model responds to high humidity in the same way.
Why Does Incubator Humidity Keep Changing?
There are days when the display seems determined to keep you busy. You check it after breakfast, and everything looks fine. An hour later, the number has moved.
Not every change means the water supply is wrong. Relative humidity responds to temperature, air exchange, and where the sensor takes its reading. The timing of the change is often your best clue.
Why Does Humidity Drop When You Open the Lid?
Opening the lid lets warm, moist air escape. If the room air is drier, the display can drop almost immediately.
What matters is what happens after you close it. Does the reading recover and hold, or does it keep falling with the incubator undisturbed? A brief drop doesn't call for the same response as a persistent one. And opening the lid again to investigate simply repeats the disturbance.
Why Do Two Hygrometers Give Different Readings?
You buy a separate hygrometer to check the incubator. The display says 58%. The new instrument says 64%.
Excellent. Now you have two numbers and no idea which one to believe.
Start with the location of each sensor. One may be closer to a water tray, fan, or warmer part of the machine. Relative humidity depends on temperature, and the instruments themselves have measurement tolerances.
Compare readings under similar, stable conditions, following the manufacturer's instructions. If the difference persists, check the approved verification procedure before changing the incubator's calibration.
How to Manage Humidity During Lockdown
Lockdown is when an unexpected humidity reading can feel especially urgent. Once eggs are close to hatching, though, opening the incubator to correct every change may do more harm than good.
For chicken eggs, lockdown usually begins around day 18. Here, the question is what to do when the reading changes unexpectedly, not which humidity setting to use.
Why Does Humidity Rise When Chicks Start Hatching?
If the humidity begins climbing while chicks are pipping, the hatch itself may be contributing moisture.

Cobb's commercial hatchery management guide explains that pipping increases absolute humidity and wet-bulb temperature. Later, absolute humidity falls while relative humidity is managed alongside a changing temperature profile. (4) A small tabletop incubator may not show that same pattern, but the moisture released during hatching can still affect its display.
Before adjusting anything, think about the timing. Did the increase follow a change to the water channels, or did it begin when chicks started emerging?

How to Lower Humidity During Lockdown
Suppose the reading climbs while several eggs are beginning to pip. Opening the lid might bring the number down, but it also releases warm, moist air around the hatching chicks.
Has the reading been consistently high since before the hatch, or did it rise only after pipping began? If it remains outside the recommended conditions, use the approved adjustment for your model rather than repeatedly opening the incubator. A brief rise during active hatching doesn't automatically call for intervention.
What if Humidity Drops During Lockdown?
If humidity falls during lockdown, first check whether water is still available. An external refill system may let you restore the supply without lifting the lid; otherwise, follow your model's hatching instructions.
Don't close the ventilation openings to compensate for low humidity. Chicks need fresh air during hatching. For CT cabinet incubators, the manual requires fully open vents at this stage; the model-specific details are explained below.
If the normal water setup isn't enough, investigate the humidity system rather than repeatedly opening the machine.
Humidity Control in Manual, PRO24, and CT Incubators
People sometimes use the term "automatic incubator" as though every automatic model manages humidity in the same way.
But automatic egg turning, automatic temperature control, external water refilling, and active humidity control are different features.
And that difference becomes particularly important when something isn't working as expected.
If you're comparing different designs, our egg incubators and hatchers collection includes tabletop, cabinet, and commercial models with different humidity-management systems.
If you're still deciding which features you actually need, our best egg incubator guide explains what automatic controls cover and how to compare different incubator designs.
| Incubator system | How humidity is managed | What deserves attention |
|---|---|---|
| Manual water trays or channels | Water evaporates from the available surface | Correct water channels, evaporation area, room conditions |
| PRO24 external refill | Water is replenished from outside; humidity is monitored digitally | Refill arrangement, water supply, surrounding conditions |
| CT Humisonic | An active system supplies moisture according to the humidity controls, with additional temperature and humidity functions on supported models | Water supply, room conditions, Humisonic operation, alarm codes |
Manual Water Channels: Learning How Your Incubator Behaves
With a basic water-channel incubator, much of the humidity management depends on how you use the water trays.
The machine provides the heated environment, while the available water surface supplies moisture through evaporation.
You need to know which channels to fill, when additional water is required, and how the machine responds to the air in the room.
If you're using a new incubator, it's worth running it before adding fertile eggs.
That gives you an opportunity to see how its humidity responds without having to make adjustments around developing embryos.
Our first-time egg incubator guide covers the checks to complete before setting eggs.
PRO24: Refilling Water Without Opening the Lid
Anyone who's tried to manage a small incubator during lockdown can appreciate the convenience of adding water without lifting the lid.
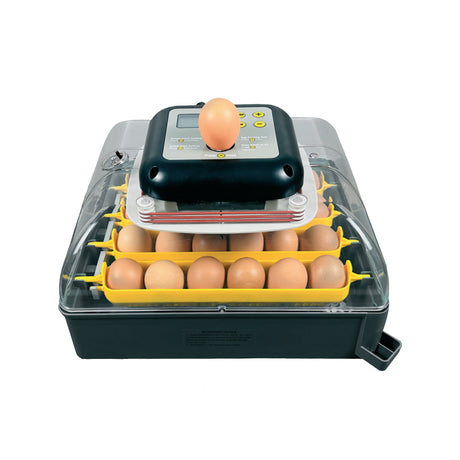
The Hatching Time PRO24 tabletop incubator has an external water-fill system, a digital humidity display, and automatic egg turning.

You can monitor the humidity reading and replenish the water through the designated external refill system.
This arrangement reduces the need to open the egg chamber for routine refilling.
But the PRO24's external refill system shouldn't be confused with an active humidifier.
Adding water from outside and automatically generating moisture are separate functions.
If humidity isn't rising as expected, check the refill arrangement and room conditions first, then refer to the model's instructions for further troubleshooting.
Tabletop incubators are also more sensitive to room conditions than insulated cabinet models. Keep the PRO24 away from drafts, windows, direct sunlight, and AC or heating vents. If the surrounding air is particularly dry, a separate room humidifier may help the incubator maintain moisture.
CT Incubators: How Humisonic Changes Humidity Management
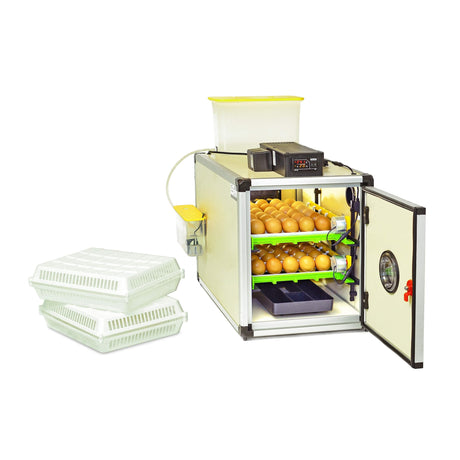
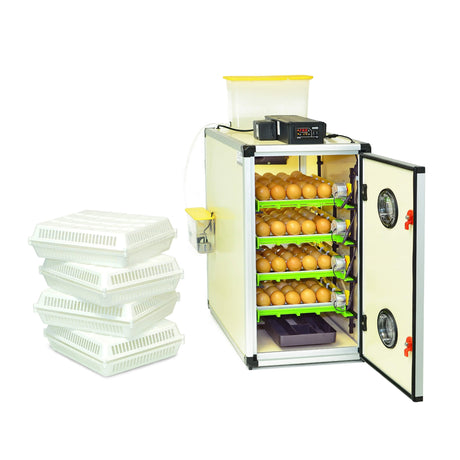
With Hatching Time's CT cabinet incubators, humidity management works differently.
The CT series uses Humisonic technology to produce moisture in response to the incubator's humidity controls.
That means you aren't relying entirely on water evaporating from a passive tray.
The system can supply moisture when required, although it still depends on an appropriate water supply and operating conditions.
The CT120 SH also includes Active Periodic Cooling (APC), a scheduled cooling program that imitates what happens when a parent bird temporarily leaves the nest. It isn't a humidity-reduction setting: any drying during the cycle depends on the surrounding air rather than a separate humidity target. The manual doesn't present APC as a way to correct high humidity, and it instructs users to turn the feature off for the final 2–3 days of incubation.
And there's a practical detail worth remembering when you're setting up the water supply.
The CT120 SH has an upper water tank for its Humisonic system, but the lower humidity tray still has a role. During normal incubation, the CT manual says to fill at least one channel if room humidity is below 50%. If the room is above 50%, the tray may remain empty, but it must stay in the machine. During the final 2–3 days of incubation, when the eggs are preparing to hatch, the manual says to keep the tray full regardless of room humidity.

For CT cabinet incubators, the ideal room temperature is 64.5 to 82.4°F (18 to 28°C). The manual lists 59 to 86°F (15 to 30°C) as the permitted room-temperature range. Keeping the incubator in a suitable room can also help reduce problems associated with unusually cool surroundings.
If your CT incubator displays Alr 6, that means the humidity inside the incubator is low. Press H to check the humidity setpoint and compare it with the internal humidity reading on the main display.
Next, press the Up arrow to bring up SnS2, the external room sensor. The top red number is the room temperature; the bottom yellow number is the room humidity. If the room is unusually dry, the Humisonic system may struggle to reach the intended humidity level.
If the problem continues, the support instructions explain how to check the Humisonic system's indicator lights.
And like any system with additional components, Humisonic has its own maintenance requirements.
For example, the Humisonic unit contains a ceramic disk. With distilled water, the usual replacement interval is approximately 6 to 12 months. Frequent hatches may bring that closer to six months, while mineral-rich water can cause buildup and shorten the disk's service life. Our Humisonic maintenance guidance recommends using distilled water.
This matters because the same low-humidity reading can have quite different explanations in a water-channel incubator and a cabinet model with active humidification.
One final difference to remember during lockdown: CT vents should remain fully open throughout hatching. Outside the hatching period, the manual requires them to stay at least one-third open. Closing them to chase a higher humidity reading would work against the ventilation the chicks need.
If you're unsure which checks are appropriate, use the Hatching Time Alr 6 troubleshooting guide or the documentation for your particular machine rather than trying procedures intended for another incubator.
Compare Two Ways to Manage Incubator Humidity
The main difference is how water reaches the incubator air. These two Hatching Time options use different approaches.
PRO24 Tabletop Incubator
External water refilling and a digital humidity display. You monitor the reading and manage the water supply.
View PRO24CT Cabinet Incubators
Humisonic actively supplies moisture according to the humidity controls. The water supply and room conditions still matter.
Explore CT IncubatorsWhen to Contact Hatching Time Support
Sometimes you've checked everything you reasonably can, and the humidity still refuses to behave.
The water supply is correct. The incubator is properly closed. The room conditions seem normal. And the display continues showing something you can't explain.
There's little benefit in repeatedly changing settings once you've reached that point.
Before contacting support, gather a few details about what you've observed.
Your incubator's model number is a good place to start. The stage of incubation matters too, especially if you're already in lockdown.
Write down the intended humidity setting and the actual reading. If it changes at particular times or after certain actions, mention that as well.
For cabinet incubators, record any alarm codes exactly as they appear.
And if water is collecting somewhere unexpected, a photograph may help the support team understand what's happening without relying entirely on a written description.
You can find model manuals, maintenance instructions, and related resources through the Hatching Time Product Support page.
With a little experience, you'll probably get to know your incubator's usual habits quite well.
You might recognize that it needs more attention when the room heating comes on, or that the humidity always drops briefly after opening but recovers without any help.
Those patterns make troubleshooting considerably easier.
And perhaps the biggest benefit is that you can spend less time worrying about every number on the display and more time enjoying the hatch itself.
References
- Mississippi State University Extension Service. Important Incubation Factors.
- University of Maine Cooperative Extension. Maine Poultry Facts: Hatching Your Own Chicks.
- University of Missouri Extension. Small Flock Series: Incubation of Poultry.
- Cobb. Managing the Hatcher Environment.
Written by:

Elif Oztuna