Table of Contents
Have you ever needed to help a chick get free from the egg, but had no idea where to start? Assisted hatching can feel intimidating the first time, especially because there are strong opinions on both sides. Some poultry keepers never step in. Others, myself included, will assist when the chick shows signs that it may not be able to finish the hatch alone.
This article is for the moments when you are looking at a pipped egg and wondering whether to wait, watch, or help. I’ll go over why a chick may need assistance, how to tell when it is time to step in, what to look for in the membrane, and how to assist slowly without rushing the chick out of the shell.
Key Hatching Terms Before You Start
Before you start checking a pipped egg, it helps to know a few hatching terms. These words come up a lot when people talk about assisted hatching, and they can make the process easier to understand.
Internal pip: This happens when the chick breaks through the inner membrane into the air cell inside the egg. You usually cannot see this from the outside, but you may hear peeping once the chick has reached the air cell.
External pip: This is the first visible crack or small hole in the shell. It means the chick has broken through to the outside air as part of the normal hatching process.

Zip: After the external pip, a chick normally turns inside the egg and makes a line of cracks around the shell. This is called zipping. Once the chick finishes zipping, it can push the cap of the egg off and hatch.
Shrink-wrap: This happens when the membrane dries out and tightens around the chick. A shrink-wrapped chick may be alive and peeping, but unable to move well enough to finish hatching.
Malposition: A malpositioned chick is not lined up in the egg the way it should be for a normal hatch. For example, it may pip at the wrong end of the egg or be unable to rotate and zip.
Yolk absorption: Before hatching, the chick finishes absorbing the yolk sac into its body. This gives the chick food and energy for the first couple of days after hatching. If the chick has not finished absorbing the yolk, it is not ready to be pulled from the shell.
Why a Chick May Need Help Hatching
Even when you do everything you can to incubate eggs properly, some chicks still run into trouble during hatch. Sometimes the cause is out of your control. The egg incubator may lose power. A thermometer or hygrometer may be reading wrong. A chick may be malpositioned in the egg. You may also be working with an egg that was rescued from outside the incubator, where the temperature and humidity were not steady.
In some cases, the chick may have an abnormality that is not survivable. But in many other cases, the chick may simply need more time, a clearer airway, or a slow assist to finish hatching.
Knowing when to assist is one of the hardest parts of the process. These are some clear signs that a chick may need help:
- It has been more than 24 hours since the first external pip, which is the first crack or hole made by the chick, and there has been no further progress.
- Other chicks have already hatched, but one or more pipped eggs are not advancing after at least 12 to 24 hours.
- You hear strong peeping or see movement, but the chick does not seem able to break through more of the shell.
- The membrane inside the pip looks dry and white, which can mean the chick is becoming shrink-wrapped inside the shell.
- The chick is malpositioned, such as pipping at the wrong end of the egg or being unable to rotate and zip around the shell.
When you see these signs, I would not rush straight into removing the chick. I would start by checking the egg more closely. There is no way to know for sure whether the chick has a survivable problem unless you look, which is why I choose to assist when the signs point that way.
When to Wait and When to Assist
| What you see | What it may mean | What I would do |
|---|---|---|
| The chick externally pipped less than 12 hours ago | It may still be resting and absorbing the yolk | Wait and watch |
| The chick externally pipped more than 24 hours ago with no progress | It may be stuck, weak, or malpositioned | Check the egg more closely |
| You hear peeping or see movement | The chick is alive and may need more air | Open a clear airway if needed |
| The outer shell membrane looks dry and white | The chick may be starting to shrink-wrap | Moisten carefully if assisting |
| You see active bleeding | The chick is not ready | Stop and return the egg to the incubator |
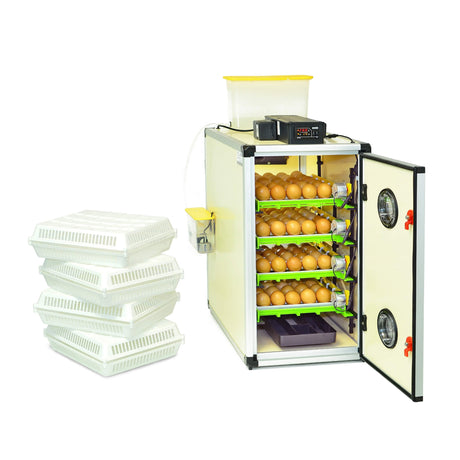
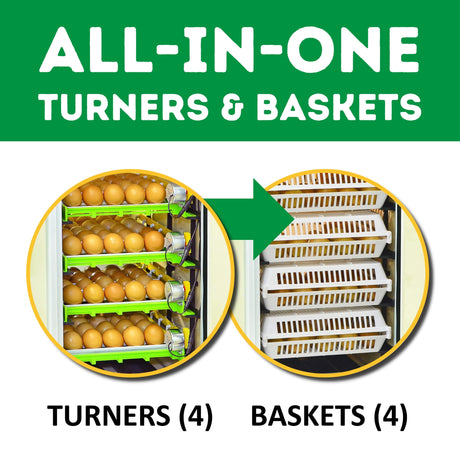
If you use a separate hatcher or hatching basket, make sure the eggs were moved at the right stage before you assume the chick needs help.
How to Tell If a Chick Needs Your Help to Hatch
If you have an incubator full of eggs that have already pipped, zipped, and pushed the cap off to hatch, and there are still a few eggs left behind, it is possible that those chicks are either deceased or they may need assistance.
I would suggest waiting until you can safely move the chicks that have already hatched into the chick brooder before assessing the rest of the eggs. If you noticed a pip on one of the remaining eggs around the same time the other chicks pipped, but there has been no progress, it may be time to check more closely.
To begin checking the egg, remove it from the incubator and hold it under a bright light. Using a pair of tweezers, gently pry up the pipped shell piece. Under that shell, you will see the outer shell membrane. This membrane is paper-like, dry, and white.
You may also need a tiny set of medical scissors or sewing scissors. Go slowly here. You are only working with the hard shell and the dry outer shell membrane.

Do not touch the moist inner membrane until you can confirm that the chick is ready to exit. Removing a small piece of shell and the dry outer membrane does no harm, and it allows more oxygen to reach the chick.
While you are doing this step, check for sound or movement. Then return the egg to the incubator.
With assisted hatching, there is no hurry as long as the chick is able to get oxygenated air. Sometimes, clearing the way for more air will give the chick the boost it needs to hatch on its own.
Make sure the humidity comes back up to between 65 and 70 percent after you return the egg. I keep the incubator open for as little time as possible and use the incubator’s normal humidity method to bring it back into range. Ventilation still matters during hatch, so do not leave vents closed while chicks are trying to breathe and finish hatching.
How Long Do You Have to Help the Chick?
Even though the other eggs in your incubator have hatched, this chick may still be absorbing the yolk sac. After the yolk is absorbed, the chick has enough sustenance to survive for approximately 48 hours without additional food or water. If you are not sure where you are in the hatch window, compare what you are seeing with the normal chicken egg hatching timeline first.
There is no rush with assisted hatching. A slow and careful process gives the chick a much better chance of surviving.
If the chick has a clear airway, is breathing, and is still resting in the egg, time is usually on your side.
How to Assist and Care for the Chick Afterward
Wait approximately 6 hours after you have opened a clear airway. Sometimes that is enough to encourage the chick to start zipping on its own.
If you do not see any progress after that, remove the egg again and check it under a bright light. Zipping usually looks like small outward pops made by the egg tooth as the chick turns inside the egg and works around the shell. This is how the chick creates the cap that it will eventually push off.
If there is still no zipping, use your tweezers to gently pop back small pieces of eggshell around the pip. Only work around the end of the pip at first.
This is usually easier if the chick is positioned correctly in the egg. A correctly positioned chick will first break through the inner membrane into the air cell at the larger end of the egg. It uses the air in the air cell while it works on making the external pip in the hard shell.
If the chick pips at the wrong end of the egg, the assist becomes more difficult. You will not know exactly where all the internal structures are, and there can be a higher risk of bleeding.
After you remove a few small sections of hard shell around the pip, stop and look at the inner membrane. Try not to involve the inner membrane yet, because that can cause bleeding.
A moist, yellowish-tinged membrane with tiny, flat, dried-up blood vessels usually means the chick is closer to being ready. Even then, you still need to go slowly. It is easy to make a mistake, and there is always the possibility of causing serious bleeding.

Place the egg back in the incubator so it can warm again and collect humidity. Let it rest for about an hour.
When the membrane looks ready to begin peeling away, use tweezers to very slowly pull it away from the chick on the open end.
If you hit a vessel that produces blood, stop immediately and return the egg to the incubator. The chick is not ready.

During the process, you may find that the inner membrane is stuck to the chick. Use warm water and a Q-tip to re-wet the membrane. Then use the tweezers to gently pull the membrane away from the chick.
I never completely remove the chick. I allow the chick to rest in the incubator after the large half of the shell and that portion of the membrane are removed. This helps make sure the hatchling gets a chance to close the navel after absorbing the yolk. The chick will usually push out of the half shell on its own.

Assisted hatching is never done quickly. It should be done very slowly and carefully over many hours.
Conclusion
Assisted hatching can be a very contentious subject among poultry keepers. I am for assisted hatching, and through 40 years of poultry keeping, it has been rare for me to assist a chick and then find that it could not survive or had a serious defect.
Sometimes the only way to understand what is happening inside the egg is to check carefully. If you choose not to help, a perfectly healthy chick may perish. If you choose to help, the safest way is to go slowly, watch the membrane, stop if you see blood, and let the chick do as much of the final work as possible.
Written by: