
Table of Contents
- Before You Set Eggs: A Quick Incubator Checklist
- 1. Know What You Are Hatching
- 2. Run and Test the Incubator Before Adding Eggs
- 3. Choose and Prepare Your Hatching Eggs
- 4. Check the Egg Trays and Turner Before Day One
- 5. Know Your Temperature, Humidity and Ventilation Plan
- 6. Know What Will Happen at Lockdown
- 7. Have the Brooder Ready Before the Chicks Hatch
- How CT, HB and T Incubators Fit Different Hatch Routines
- What About Active Periodic Cooling and Humisonic Humidity?
- One Last Check Before You Set the Eggs
Getting ready to incubate your first batch of eggs is exciting. And, at first, the process can look pretty simple. Put fertile eggs in the incubator, enter the settings, and wait for chicks.
Then you start thinking about everything that can happen between day one and hatch day.
Is the temperature reading correct? Are the eggs sitting in the right tray? Is the turner actually moving? What happens when turning needs to stop? And once the chicks hatch, where are they going?
Those are much better questions to ask before the eggs are inside.
This guide focuses on the setup decisions that are easiest to miss when you are using an egg incubator for the first time. It will not give one incubation schedule and pretend it works for every bird. Chicken, quail, duck, turkey and goose eggs do not all follow the same timeline or use the same tray setup.
If you are still deciding which machine fits your flock, start with our guide to choosing the right egg incubator. This article starts after that decision, when you are getting ready to actually use it.
Before You Set Eggs: A Quick Incubator Checklist
| Check | What to Confirm | Why It Matters |
|---|---|---|
| Egg type | Species, egg size and expected incubation period | Chicken, quail, duck, turkey and goose eggs do not all use the same trays or hatch schedule |
| Incubator test | Temperature, humidity, fan, alarms, vents and water system | Problems are much easier to correct before fertile eggs are inside |
| Hatching eggs | Clean, intact shells and normal egg shape | Cracked, leaking or heavily soiled eggs are poor candidates for incubation |
| Tray and turner | Correct tray size, secure egg placement and free turner movement | Eggs need to fit securely without jamming or slipping through the mechanism |
| Incubation settings | Species-specific temperature, humidity and ventilation plan | A default chicken program should not automatically be used for every poultry species |
| Lockdown | When turning stops, where eggs will hatch and whether hatching baskets are needed | You do not want to work out the hatch setup after eggs have already started pipping |
| Brooder | Heat, feeder, drinker, footing and a secure brooder space | Dry chicks need somewhere suitable to go when they are ready to leave the incubator |
You are basically checking the whole route before the trip begins. Egg to setter. Setter to lockdown. Hatch to brooder.
That sounds obvious. But fixing a tray problem or finding out that your brooder is missing a heat source is much easier before you have developing embryos or newly hatched chicks depending on the equipment.

1. Know What You Are Hatching
Before changing a single incubator setting, start with the eggs.
Chicken eggs are usually the reference point people see in incubator instructions and capacity numbers, but that does not mean those numbers transfer directly to other poultry.
Quail eggs are much smaller. Duck, turkey and goose eggs are larger. Incubation length, the day turning stops, tray fit and moisture management can also change by species.
So write down:
- the species you are hatching
- the approximate number of eggs
- the correct tray or separator for that egg size
- the expected incubation period
- the day turning should stop
- whether the same unit will be used for setting and hatching
If you are working with Coturnix, our quail egg incubation guide gives the full species-specific timeline.
For chicken eggs, use the dedicated chicken egg temperature and humidity guide rather than applying a generic poultry number to every hatch.
Hatching more than one species? A machine may be capable of incubating several poultry species, but that does not automatically mean different species belong in the same batch. Compare incubation length, turning dates, egg size and hatch requirements before combining eggs.
2. Run and Test the Incubator Before Adding Eggs
This is probably the least exciting part of incubation, but it can save you from finding a problem after the eggs are already inside.
Set up the incubator in the room where you plan to use it and give it time to operate before loading the batch.
Illinois Extension recommends placing an incubator away from drafts, direct sunlight and heavy traffic, and bringing it to operating temperature before fertile eggs are set. It also recommends using a reliable thermometer at egg level. (1)
During your test run, check:
- Does the machine reach the target temperature?
- Does the reading remain reasonably stable?
- Is the fan operating normally if the incubator is forced-air?
- Is the humidity system responding?
- Is there enough water in the correct reservoir or tank?
- Are high and low alarms working if your model has them?
- Is anything blocking the air vents?
- Does the turner move when it is supposed to?
A second thermometer or hygrometer can also give you another point of reference. It does not automatically become the calibration standard, but a large disagreement between sensors is something worth investigating before setting eggs.
If you prefer to see the setup process, Hatching Time also has an egg incubator setup video that works well as a visual companion to this checklist.
3. Choose and Prepare Your Hatching Eggs
Not every egg belongs in the incubator just because it is fertile.
Start with eggs that have intact shells and a normal shape for the bird you are hatching. Cracked, leaking, badly misshapen or heavily soiled eggs are poor candidates for setting.
University of Georgia Extension recommends collecting hatching eggs frequently and keeping them clean. For light debris, it advises dry cleaning rather than wiping hatching eggs with a wet towel, which can move contamination across the shell. (2)
That is a better approach than routinely washing every hatching egg before incubation.
What if the eggs were stored or shipped?
Do not move cold eggs straight into a warm incubator if doing so will cause condensation on the shell.
Allow cooler eggs to warm gradually before setting them. This is also a good time to inspect shipped eggs for cracks or obvious damage from transit.
Some breeders recommend a longer settling period for shipped eggs, especially when shipping has disturbed the air cell. There is no reason to turn that into one universal 12- or 24-hour rule for every shipment. Follow the breeder or supplier's handling instructions and avoid unnecessary handling.
Can you tell whether an egg will hatch before setting it?
Not with certainty.
You can choose a good-quality hatching egg before incubation, but candling becomes much more useful after embryo development has started.
Later in the hatch, the egg candling guide can help you compare clear eggs, developing blood vessels, blood rings, air cells and normal embryo development.
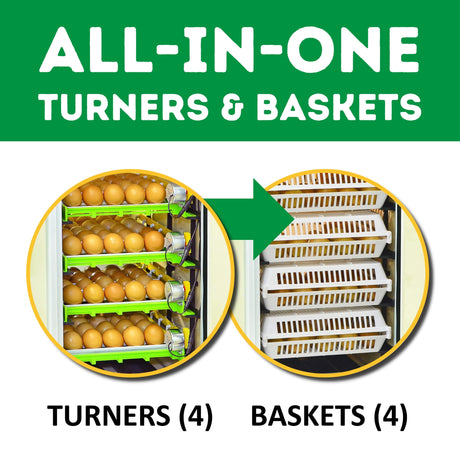
4. Check the Egg Trays and Turner Before Day One
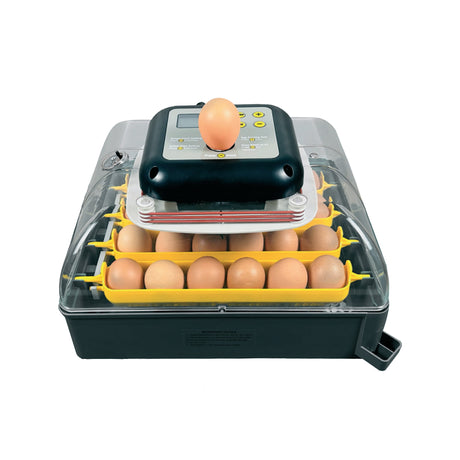
An automatic incubator takes a lot of repetitive work out of turning eggs, but there is still one thing you need to do yourself: make sure the system actually fits the eggs you are putting into it.
A tray made for chicken eggs may not hold quail eggs correctly. Larger duck, turkey or goose eggs may need different spacing or separators.
Before loading fertile eggs, test your egg setter trays with the correct egg size and check that:
- the eggs sit securely
- the tray is not overcrowded
- the eggs do not slip through or jam the mechanism
- the turning system can move freely
- nothing inside the cabinet blocks the tray
Automatic turning does not mean the incubator can be ignored. Look at the tray position during normal checks and confirm that it is actually changing.
If you are turning manually or want to understand egg orientation, turning frequency and when turning stops, that information belongs in our guide to properly incubating poultry eggs.
The important thing here is simpler: test the mechanism before the embryos depend on it.
5. Know Your Temperature, Humidity and Ventilation Plan
Temperature and humidity are usually the first numbers a new incubator owner worries about. And they matter. But the numbers only help if they are the right ones for the eggs you are actually hatching.
A chicken setting is not automatically a quail setting, and a schedule that works for chicken eggs should not be copied over to duck or goose eggs without checking the requirements first.
Before the eggs go in, I would make sure you know three things: the temperature your species needs, how your incubator handles humidity, and how fresh air moves through the machine.
You should also know where the incubator is taking its temperature reading. That becomes especially important if you are comparing the built-in display with a separate thermometer.
Humidity can take a little trial and error when you are new to incubation. Some machines use water channels or reservoirs that you manage yourself. Others handle more of that automatically. Either way, check the water supply and make sure the system responds before you depend on it for a hatch.
And keep an eye on the vents. It can be tempting to close things up when you are trying to hold humidity, but developing embryos still need fresh air. Ventilation becomes even more important as hatch approaches.
If your incubator has saved programs or species settings, go through them before day one instead of assuming the default is right for the batch in front of you.
For chicken eggs, our temperature and humidity guide covers the settings in much more detail. If you are hatching Coturnix, use the Coturnix quail incubation guide instead.
That is more useful than trying to squeeze one temperature and humidity chart into a checklist meant for several different types of poultry.
6. Know What Will Happen at Lockdown
A lot of first-time hatchers plan carefully for the day the eggs go into the incubator and then think much less about the last few days.
Those last few days need their own plan.
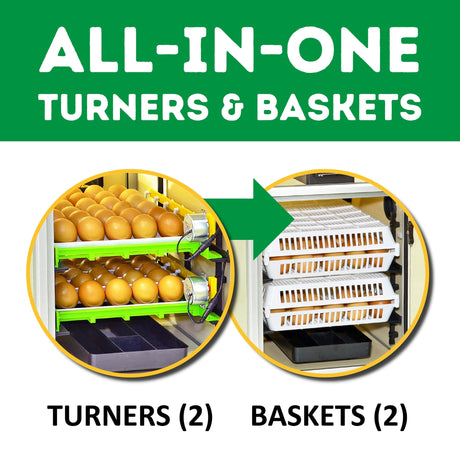
Turning eventually has to stop. Depending on the incubator, the eggs may need to come out of the setter tray and move into hatching baskets. Humidity usually changes for hatch. And if you use separate setting and hatching machines, the eggs need to move at the right time.
So before you even start the batch, check when lockdown begins for the species you are hatching and what your particular machine expects you to do when you get there.
Some useful things to know ahead of time are:
- when the turner stops
- whether the setter tray stays in or comes out
- where the eggs will sit during hatch
- how you will manage hatch humidity
- whether you are using the same incubator or a separate hatcher
If your machine uses hatching baskets, make sure you have the correct baskets and know where they go before chicks start pipping.
For people who hatch regularly, using a separate hatcher-only incubator can also make the workflow cleaner. Eggs that are still being turned can remain in the setter while another group goes through lockdown and hatch separately.
Can You Open the Incubator During Hatching?
It is tempting. You hear a chick, see the first pip, and suddenly you want to look every five minutes.

Try not to.
Opening the incubator during active hatch changes the conditions inside, particularly humidity. That is why unnecessary opening is worth avoiding while chicks are pipping and working their way out of the shell.
At the same time, I would not turn that into a rule that says the door can never be opened until every last egg has hatched. That can create a different problem if dry chicks are ready to move and the hatch is spread out over a longer period.
Know your incubator, watch what is happening, and keep openings brief and purposeful rather than checking simply because you are curious.
7. Have the Brooder Ready Before the Chicks Hatch
You can have the incubator running perfectly and still make hatch day much harder than it needs to be if the brooder is sitting in pieces in another room.
I would have the basic brooder setup figured out before the eggs are set.
You do not need to heat an empty brooder for the entire incubation period. You do need to know where it is going, what you are using for heat, how the chicks will reach food and water, and whether the floor gives tiny feet enough grip.
Before hatch day, have these ready:
- a clean and secure brooder
- the heat source you plan to use
- a feeder the chicks can reach
- a drinker suitable for newly hatched birds
- safe footing with good traction
- any thermometer or temperature control your setup requires
Then test the setup before the chicks move in.

Watch the chicks after transfer too. A temperature reading gives you a starting point, but their behavior tells you a lot. Chicks crowding tightly around the heat may be cold. Chicks avoiding it may be too warm. You want them able to move comfortably between warmer and cooler parts of the brooder.
Hatching Time also has chick brooders and brooding equipment for chickens, quail and other poultry, along with heating plates for setups that use radiant brooder heat.
One thing worth doing early: assemble the brooder before hatch week. Missing hardware is much less interesting when chicks are already drying in the incubator.
Where CT, HB and T Incubators Fit
The original question behind this article was pretty simple: what do you actually need to know before you start incubating eggs?
Part of that is knowing whether the machine itself fits what you are trying to do.
A person hatching a few batches a year on a homestead has a different routine from someone setting eggs every week. And both are very different from a commercial hatchery moving thousands of eggs through setters and hatchers.
CT Incubators
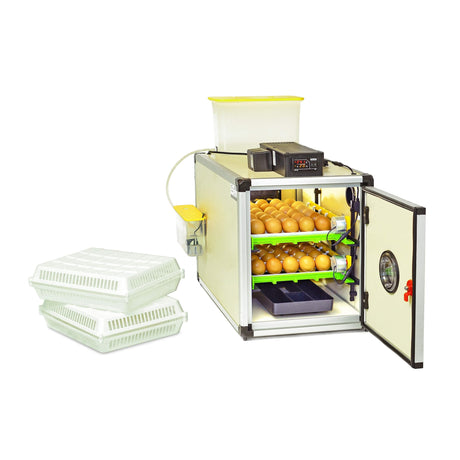
CT incubators are a good place to look when you have moved beyond a very small tabletop hatch and want cabinet capacity with automatic controls.
There are CT configurations that let you set and hatch in the same cabinet, as well as setups that separate the two stages.
That flexibility matters if you know you will be hatching more than once. You can start thinking about the process as a cycle instead of treating every hatch as a one-off event.
HB Incubators
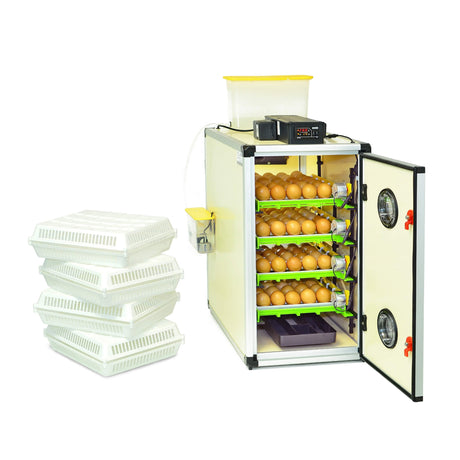
HB incubators move into larger-capacity cabinet hatching.
At that point, capacity is only one part of the decision. You also need to think about how often eggs are being set, whether different batches overlap, and whether you want setting and hatching happening in the same cabinet.
That is where separate setter and hatcher configurations start making a lot more sense.
T Series Incubators
The T Series is aimed at much larger hatch volumes and commercial poultry operations.
The original draft mentions capacities reaching up to 10,000 eggs across the T Series commercial incubators. At that scale, you are planning batches, hatch schedules and equipment flow very differently from somebody running a first cabinet incubator at home.
That is why I would not choose an incubator by capacity alone. Think about what happens to the eggs from the day you set them until the day the chicks leave the hatcher.
What Are Active Periodic Cooling and Humisonic Humidity?
If you are comparing Hatching Time incubators, you will probably run across both of these terms.
They sound technical, but the basic ideas are fairly straightforward.
Active Periodic Cooling
Active Periodic Cooling, or APC, gives compatible incubators the ability to run programmed cooling periods during incubation.
The idea comes from natural incubation. A bird does not sit on the nest under perfectly unchanged conditions every minute of the day. When she leaves temporarily, the eggs cool and lose some moisture before she returns.
APC is designed to reproduce that kind of controlled cooling period through the incubator program.
What I would not do is see that feature and start creating random cooling schedules yourself. Use the settings and program intended for the species and incubator model you are working with.
Humisonic Humidity Control
Humidity is one of the things new hatchers tend to watch constantly, especially once they realize how much room conditions can affect it.
On incubators equipped with the Humisonic system, humidity can be managed automatically toward the setting you enter rather than relying entirely on manually topping up trays or channels.
That saves some hands-on adjustment, but you still need to check the machine.
Make sure the water supply is there. Watch the humidity reading. If something suddenly looks different from what you normally see, investigate it.
The same goes for the automatic turner, alarms and other automated features. Automation can remove repetitive jobs from incubation. It does not mean nobody needs to look at the eggs or the machine for three weeks.
One Last Look Before the Eggs Go In
Right before I set a batch, I would rather spend another five minutes checking an empty incubator than discover something obvious the next morning.
Are the right trays installed? Is the turner moving?
Is there water where there needs to be water? Are the temperature and humidity readings where you expected them to settle?
Do you know when turning stops?
Do you have the hatching baskets you will need later?
And, maybe most importantly, do you have somewhere ready for the chicks once this works?
Incubation gets much less intimidating once you stop looking at it as one long 18-, 21- or 28-day wait.
It is a series of smaller stages. Get the first setup right, check the machine as you go, and know what the next stage requires before you reach it.
References
- University of Illinois Extension. Incubation-Embryology Checklist. - https://extension.illinois.edu/incubation-embryology-checklist
- University of Georgia Extension, Poultry Tips. Handling Eggs After They Are Laid. - https://site.extension.uga.edu/poultrytips/2017/02/handling-eggs-after-they-are-laid
Written by:
Elif Oztuna
Organic Growth SEO & Content Marketing ManagerElif writes about egg incubation, brooding, poultry care, and poultry equipment, with a focus on the questions that come up when you're actually trying to hatch eggs or care for a growing flock. Her background in advertising and psychology shapes the way she approaches those questions: understand the problem first, then make the answer as useful and clear as possible.