
Table of Contents
- Duck Egg Incubation Schedule
- 1. Choose Eggs Suitable for Hatching
- 2. Test the Incubator Before Setting
- 3. Position the Eggs Correctly
- 4. Manage Temperature, Humidity, and Vents
- 5. Turn Duck Eggs Until the Final Three Days
- 6. Do You Need Cooling and Misting?
- 7. Candle at Useful Times
- 8. Prepare for Lockdown on Day 25
- 9. Allow Time to Hatch
- 10. Check the Pattern After a Poor Hatch
- What Changes With Muscovy Eggs?
- Do You Need a Duck-Specific Incubator?
You’ve pulled off a perfect chicken hatch. You feel confident. Naturally, you figure ducks will follow the exact same script. You set the machine, load up those trays, and wait for the magic, right?
That assumption can throw an entire hatch off schedule before anything even looks wrong.
Here is the reality. Most common domestic duck eggs, including Pekins, Rouens, and Khaki Campbells, need about 28 days to hatch. If you rely on a standard 21-day chicken countdown, you will reach the final stage a full week too early. Duck eggs are also much larger. That means tray fit and water loss require genuine attention, not a hopeful guess.(1) (2) (4)
The basic job looks familiar enough. Keep your duck egg incubator stable. Turn the eggs. Monitor the air cells, and let the ducklings emerge.
But things get awkward fast. Go online, and forums will give you completely conflicting advice about cooling and misting. Think about it. Does a daily spray routine copied from another keeper make sense when your forced-air incubator is already running a programmed cooling cycle?
Not automatically. You may be placing a second method on top of the program your machine was designed to follow.
Let’s strip away the confusion. This guide uses a forced-air incubator and common domestic duck eggs as its baseline. For the main incubation period, start with 99.5°F (37.5°C) and about 55 to 60 percent relative humidity. Turn the eggs through Day 24. On Day 25, stop turning and prepare for hatch. Hatch-stage settings commonly sit around 98.5 to 99°F, with humidity beginning near 65 percent.(1) (3) (4)
You may also see 100°F in established instructions. Mississippi State uses 100°F for forced-air duck incubation, while Cornell and the University of Maryland use 99.5°F. Both sit within the narrow forced-air range described by Texas A&M. Use the program supplied for your incubator rather than switching between sources during the same hatch.(1) (2) (3) (4)
Those numbers give you a reliable starting point. The manual still decides how your particular incubator handles airflow, turning, humidity, and programmed cooling.
Quick answer: Most common domestic duck eggs hatch in about 28 days. In a forced-air incubator, use 99.5°F (37.5°C) and about 55 to 60 percent relative humidity through Day 24. Stop turning on Day 25. For the final three days, use the model’s hatch settings, commonly about 98.5 to 99°F with humidity beginning near 65 percent, and keep the ventilation open.(1) (3) (4)
Duck Egg Incubation Schedule
Grab a piece of masking tape now, while the dates are still obvious. Write down the setting date, your Day 25 lockdown date, and the expected hatch date. Stick the tape on the machine where you will see it every day.
Check how your incubator handles its countdown too. Some programs treat the setting date as Day 0, while others call it Day 1. The name of that first day matters less than getting lockdown onto the calendar with roughly three days remaining.
| Stage | Forced-air temperature | Relative humidity | Turning | Main job |
|---|---|---|---|---|
| Before setting | Preheat the machine | Stabilize the reading | No | Test the fan, tray, water system, turner, and alarms for at least 24 hours |
| Days 1-7 | 99.5°F (37.5°C) | About 55-60% | Yes | Confirm that the tray moves and candle around Day 7 |
| Days 8-24 | 99.5°F (37.5°C) | About 55-60% | Yes | Keep a daily log and watch air-cell growth |
| Day 25 | About 98.5-99°F (36.9-37.2°C), or the model-specific hatch setting | Begin around 65%, or use the model-specific hatch setting | Stop | Candle once more, disable or remove the turner, and prepare the hatching area |
| Days 26-28 | About 98.5-99°F (36.9-37.2°C), or the model-specific hatch setting | Maintain the model’s hatch setting | No | Keep the vents clear and avoid unnecessary opening |
| After hatch | Follow the incubator and brooder instructions | Not applicable | No | Move ducklings after they are dry and active |
1. Choose Eggs Suitable for Hatching
First run the incubator prior to starting incubation. An incubator can be calibrated perfectly, and still have a low hatch rate. How? The eggs may have been old, stored incorrectly, or damaged before they ever reached the tray.
Start with clean eggs that have intact shells and a normal shape. Discard any eggs that are misshapen, too big or too small, double yolkers, dirty, or cracked.(1) (3) (4)
And bigger is not better here. An oversized egg may fit awkwardly in the tray and is more likely to contain two yolks. An average-sized egg with a sound shell gives you a much more sensible starting point.
Freshness gives you an advantage. Cornell recommends setting duck eggs within one to three days when possible and reports that hatchability declines as storage extends beyond a week.(1)
If you need to store them, keep the large end pointing up in a cool room. Cornell’s duck guidance uses about 55°F (13°C) and 75 percent relative humidity. A kitchen refrigerator is too cold for the recommended storage conditions and can reduce hatchability.(1) (4)
Let stored eggs warm gradually before setting. Moving a cool egg directly into a warm, humid chamber can create condensation on the shell. Handle the eggs with clean, dry hands, and do not wash them as a routine preparation step.(3) (4)
What about shipped duck eggs?
Give shipped eggs about 24 hours to settle before setting them. Keep them with the large end facing up in a cool, stable location away from direct sunlight, and inspect each shell for damage when the package arrives.(3)
If you candle the eggs before incubation, use the result only as a record of their condition on arrival. Do not treat the appearance of the air cell alone as proof that an egg will or will not hatch. Handle the eggs gently and follow any specific instructions supplied by the breeder.
2. Test the Incubator Before Setting
Run your incubator empty for at least 24 hours in the room where it will stay. A machine that holds a perfect temperature on the kitchen counter may behave very differently beside a drafty window, exterior door, or air-conditioning vent.
During the test run, check the fan, temperature display, humidity system, water supply, alarms, and ventilation openings. Watch the turner. A motor making a humming noise does not prove the tray is actually moving through its full range.
Make sure your duck eggs fit securely without rubbing against one another or jamming the mechanism. Empty space inside the incubator means very little if the installed tray is wrong for the eggs.
If you compare the built-in display with a second thermometer or hygrometer and the two disagree widely, investigate before setting valuable eggs. The extra device does not automatically become the correct one, but a large difference should not be ignored.
For a complete first run, work through the egg incubator setup checklist before the embryos depend on the machine.
3. Position the Eggs Correctly
In a vertical tray, place the eggs with the large end up and the small end down. In a horizontal tray, lay them on their sides with the large end slightly elevated. The air cell is located at the large end. Never set an egg with the small end up.(2) (4)
Once you load the eggs, the temperature display will drop for a while. This is normal. The eggs entered cooler than the air around them, and the machine needs time to recover.
Let it recover naturally. Please do not push the thermostat up every five minutes. A nervous correction can leave the eggs overheating once the incubator finally catches up.
Look more often during the first day. Confirm that the temperature recovers, the humidity system responds, and the tray position changes. After that, keep a simple daily record of the readings and anything unusual, such as an alarm, power interruption, or missed water refill.
4. Manage Temperature, Humidity, and Vents
Do not chase every tiny fluctuation on the digital display. Opening the lid, adding water, and ordinary changes in room temperature can cause brief variation. What deserves attention is a pattern that stays consistently too hot or too cold.
A machine that remains too warm can bring the hatch forward and reduce hatchability. One that runs cool can delay the hatch and spread it over several days. If the same suspicious reading keeps returning, check the room, sensor position, and calibration instructions before making a large adjustment.(2)
Watch the air cells, not only the humidity display
About 55 to 60 percent relative humidity is a solid starting point through Day 24. As water leaves the egg, the internal air cell expands. By Day 25, Cornell expects the air cell to occupy about one-third of a common duck egg and uses about 14 percent weight loss from the time of setting.(1)
Check several eggs before changing anything. If most air cells still look small near lockdown, the batch may have lost too little water. If they look unusually large, the eggs may have lost too much.
Do not change the settings because one egg looks different. Shell quality varies, and one porous shell can lose water faster than the rest of the tray.
Room humidity, ventilation, storage conditions, and incubator design all affect water loss. This is why two people can run the same displayed humidity and still see different air cells.
Keep the vents open
Please do not plug the ventilation holes to force the humidity upward. Developing embryos need fresh air, and that need increases toward the end of incubation.
Add moisture through the water channels or humidity system while keeping the ventilation path clear. A higher humidity reading does not help if it was achieved by reducing the air available to the ducklings.(2) (4)
5. Turn Duck Eggs Until the Final Three Days
Duck eggs need regular turning while the embryo develops. Cornell advises at least four turns a day, Mississippi State gives four to six, and Texas A&M recommends at least five turns within 24 hours.(1) (2) (4)
If you are doing this by hand, five times a day is practical and meets Texas A&M’s minimum. Mark one side lightly with an X and the other with an O so you can confirm that each egg has been turned. Turn gently with clean hands and keep the incubator open for as little time as possible.(2) (4)
If the machine turns automatically, look at the tray during your normal checks. A stuck egg can remain in nearly the same position while the motor continues to sound perfectly normal.
Stop all turning around Day 25, with roughly three days left before hatch. Remove or disable the turning system according to the instructions for the model. The guide to egg placement and turning in an incubator covers the mechanics in more detail.

6. Do You Need Cooling and Misting?
Giving a definitive yes or no here would be dishonest.
Research confirms that cooling and spraying are genuine waterfowl incubation practices, but it does not produce one universal home-incubator schedule. A Poultry Science field study found higher hatchability in sprayed White Pekin duck eggs under the commercial conditions tested. Another peer-reviewed study examined Muscovy eggs cooled and sprayed three times a week and found that the method appeared beneficial for larger eggs. Cornell’s basic procedure for common duck eggs does not require either step.(1) (5) (6)
Those studies used controlled methods tied to a particular species, egg size, schedule, and incubator environment. They do not establish that every home hatch should be sprayed or cooled. Cooling time, water temperature, frequency, room conditions, ventilation, and water loss all belong to the same protocol. A random spray is not an emergency repair for an air cell that looked unusual once.
Check the manual. If your machine runs Active Periodic Cooling, do not add manual cooling or spraying without confirming the correct program. Ask Hatching Time customer support when the instructions do not give a clear duck setting for your model.
7. Candle at Embryonic Milestones
You do not need to candle every day. Candle your duck eggs at these three days of incubation.
Around Day 7, look for a dark embryo spot and a network of blood vessels. A clear-looking egg may be infertile, but dark shells and a poor angle can hide early development. If the shell is intact, there is no bad smell, and you are unsure, return it to the incubator and check again after a few days.
Around Day 14, the dark area should be larger, the vessels easier to follow, and movement may be visible. Compare the air cell with your first check. You are looking for progress, not trying to force every egg to match one perfect candling photo.
Do the final candle on Day 25 before raising humidity and preparing the hatching area. A viable embryo should fill most of the egg, while the air cell should have grown substantially.(1)
The complete egg candling guide shows what normal development can look like and explains why one uncertain view should not lead to a rushed decision.

8. Prepare for Lockdown on Day 25
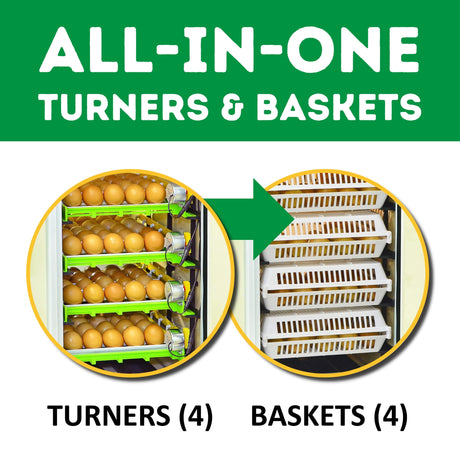
The final three days require a different setup. Finish the last candle first. Stop turning. Remove or disable the setter tray as the manual directs, then place the eggs in the hatching basket or position used by the model.
Run a quick checklist before closing the machine:
- Do the eggs have enough room to pip and hatch?
- Is the water supply ready?
- Are the vents clear?
- Has any cooling or misting routine stopped?
- Is the brooder assembled, warmed, and tested?
Hatch-stage temperature commonly sits around 98.5 to 99°F, with humidity beginning near 65 percent. Use the hatch setting provided for your incubator.(1) (4)
Some protocols raise humidity again after the first eggs pip. Cornell moves toward 80 percent in its hatcher procedure, while Mississippi State gives 65 percent or more for hatching. Treat Cornell’s 80 percent figure as one specific protocol, not a universal number for every home incubator, especially when the machine controls humidity automatically.(1) (2)
Do not open the lid just to peek. It releases the warm, moist air the ducklings need. That does not make the incubator untouchable until the final egg hatches, but every opening should be brief and have a real purpose.
9. Allow Time to Hatch
The first stage happens inside the egg. The duckling breaks into the air cell before you see anything from outside. That is the internal pip. The external pip is the first visible crack or hole. Zipping comes later, when the duckling begins breaking a line around the shell.
Write down the time when you first notice an external pip. Ducklings can rest for a long time between pipping stages, and a written time is much more reliable than checking every few minutes until the wait feels endless.
That resting phase can feel like torture. But the pause is a normal part of the hatch. Texas A&M describes lengthy periods of rest between bursts of activity, while the University of Maryland warns that helping a bird out of the shell carries real risks. If the duckling is still making progress, leave it alone.(3) (4)
If progress appears to have stopped, the visible membrane looks dry and tight, or you are considering removing shell, contact Hatching Time support or someone experienced with waterfowl before you intervene. There is no single number of hours that describes every assisted hatch.
Our guide to assisted-hatching risks and warning signs explains why timing, active blood vessels, and yolk absorption matter.
Leave ducklings in the machine until they are dry and active. Avoid opening the incubator each time one damp duckling appears while other eggs are still pipping.
10. Check the Pattern After a Poor Hatch
A failed egg rarely arrives with a neat explanation. Look at the pattern across the batch, your candling notes, and the incubator record together.
| What you observe | Possible reasons | What to check first |
|---|---|---|
| Little or no development around Day 7 | Infertility, shipping damage, poor storage, or very early embryo loss | Egg source, storage time, shipping condition, and first-week temperature |
| A blood ring or early stopped development | A temperature problem, rough handling, contamination, or weak egg quality | Temperature log, sensor accuracy, and handling routine |
| Air cells remain small near Day 25 | Water loss may have been too low | Compare several eggs and review humidity, ventilation, and batch weight loss |
| Air cells look unusually large | Water loss may have been too high, including during storage | Storage conditions, room humidity, and incubator water supply |
| The hatch is late or spread over several days | The machine ran cool, eggs were old, or temperature varied across the tray | Thermometer accuracy and warm or cool areas in the incubator |
| Eggs pip but make no further progress | Humidity, ventilation, malposition, or embryo weakness may be involved | Lid-opening history, vents, hatch settings, and the time of each external pip |
| Exposed membranes look dry and tight | Humidity may have fallen after pipping | Restore the model’s hatch setting without closing the vents or repeatedly handling eggs |
Do not diagnose the entire cycle from one egg. If many embryos stop at a similar stage, look for something the batch shared. If one egg fails while the rest hatch normally, egg quality or position may be more likely than a problem across the entire incubator.(2) (4)

What Changes With Muscovy Eggs?
Muscovies are a separate duck species. They do not follow the 28-day calendar used for Pekins, Rouens, Khaki Campbells, and other mallard-derived domestic ducks.
Muscovy eggs normally take about 35 days.(1) Mississippi State gives a range of 35 to 37 days and recommends stopping turning after Day 31, while Texas A&M lists transfer to the hatcher between Days 31 and 33.(2) (4)
Do not move Muscovy eggs into lockdown with a normal 28-day batch simply because both birds are called ducks. Use a complete Muscovy schedule and confirm the program for your machine.
Do You Need a Duck-Specific Incubator?
No. You need a multi-species machine that physically fits the larger eggs, turns them correctly, maintains the duck schedule, and leaves enough room for hatch.
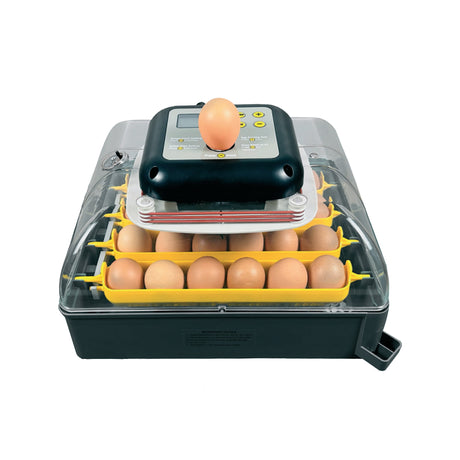
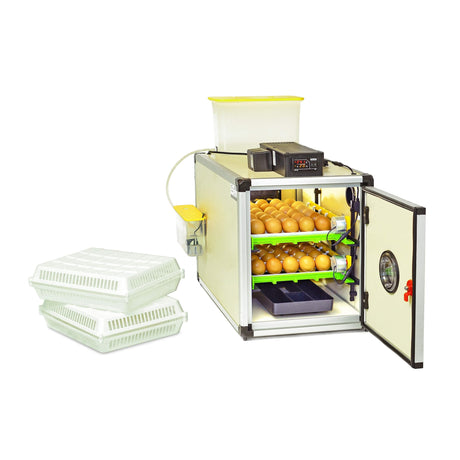
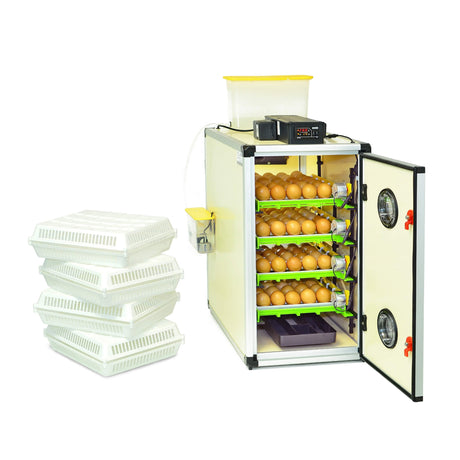
Check the actual duck egg capacity in the product description instead of assuming the model number applies to every species. Capacity depends on the machine and the fitted tray. For example, the Pro24 lists 24 chicken eggs but 20 duck eggs, while the CT60SH lists 60 chicken eggs and 40 duck eggs. Large duck varieties may need even more room. A large empty chamber is useless if the supplied tray cannot hold the egg securely.
The Duck Egg Incubators collection brings together Hatching Time models whose descriptions include duck egg capacities. The incubators can still be used for other compatible poultry species with the correct trays and settings.
Think about timing as well as capacity. One combined setter and hatcher can work for a single batch that shares the same date. If you add eggs regularly, the oldest group may need turning to stop and hatch humidity to rise while younger eggs still need the normal incubation routine. A separate hatcher keeps those stages apart.
Focus on the number of duck eggs you will actually set together, how often you plan to hatch, and which tray comes with the machine. The egg incubator buying guide explains how those batch decisions affect the model you need.
Once the schedule is right, duck incubation stops feeling like a mysterious version of chicken incubation. It becomes a series of specific checks: fit the eggs, stabilize the machine, watch the air cells, stop turning on time, and prepare for hatch before Day 25 arrives.
Stick to the data, but keep watching the eggs in front of you. That gives the batch the conditions it needs and gives you something useful to learn from, whatever the final hatch rate.

References
- Cornell University College of Veterinary Medicine, Duck Research Laboratory: Hatching Duck Eggs - https://www.vet.cornell.edu/animal-health-diagnostic-center/programs/duck-research-laboratory/hatching-duck-eggs
- Mississippi State University Extension Service: Important Incubation Factors - https://extension.msstate.edu/agriculture/livestock/poultry/important-incubation-factors
- University of Maryland Extension: Hatching Eggs at Home (FS-1114) - https://extension.umd.edu/resource/hatching-eggs-home-fs-1114
- Texas A&M AgriLife Extension: Incubating and Hatching Eggs - https://aggie-horticulture.tamu.edu/wp-content/uploads/sites/12/2011/02/Lee-Cartwright-Incubating-and-hatching-eggs.pdf
- Sarpong, S. and Reinhart, B. S. Effect of Spraying White Pekin Duck Eggs on Hatchability. Poultry Science, 64(2), 221-225. - https://doi.org/10.3382/ps.0640221
- Harun, M. A., Veeneklaas, R. J., Visser, G. H. and Van Kampen, M. Artificial Incubation of Muscovy Duck Eggs: Why Some Eggs Hatch and Others Do Not. Poultry Science, 80(2), 219-224. - https://doi.org/10.1093/ps/80.2.219
Written by:
Elif Oztuna
Organic Growth SEO & Content Marketing ManagerElif writes about egg incubation, brooding, poultry care, and poultry equipment, with a focus on the questions that come up when you're actually trying to hatch eggs or care for a growing flock. Her background in advertising and psychology shapes the way she approaches those questions: understand the problem first, then make the answer as useful and clear as possible.